
简化 NestJS 中的文件上传:无需磁盘存储即可高效内存中解析 CSV 和 XLSX
 浏览:335
Effortless File Parsing in NestJS: Manage CSV and XLSX Uploads in Memory for Speed, Security, and Scalability
Introduction
Handling file uploads in a web application is a common task, but dealing with different file types and ensuring they are processed correctly can be challenging. Often, developers need to parse uploaded files without saving them to the server, which is especially important for reducing server storage costs and ensuring that sensitive data is not unnecessarily retained. In this article, we’ll walk through the process of creating a custom NestJS module to handle file uploads specifically for CSV and XLS/XLSX files, and we’ll parse these files in memory using Node.js streams, so no static files are created on the server.
Why NestJS?
NestJS is a progressive Node.js framework that leverages TypeScript and provides an out-of-the-box application architecture that enables you to build highly testable, scalable, loosely coupled, and easily maintainable applications. By using NestJS, we can take advantage of its modular structure, powerful dependency injection system, and extensive ecosystem.
Step 1: Setting Up the Project
Before we dive into the code, let’s set up a new NestJS project. If you haven’t already, install the NestJS CLI:
npm install -g @nestjs/cli
Create a new NestJS project:
nest new your-super-name
Navigate into the project directory:
cd your-super-name
Step 2: Installing Required Packages
We’ll need to install some additional packages to handle file uploads and parsing:
npm install @nestjs/platform-express multer exceljsfile-type
- Multer: A middleware for handling multipart/form-data, which is primarily used for uploading files.
- Exlesjs: A powerful library for parsing CSV/XLS/XLSX files.
- File-Type: A library for detecting the file type of a stream or buffer.
Step 3: Creating the Multer Storage Engine Without Saving Files
To customize the file upload process, we’ll create a custom Multer storage engine. This engine will ensure that only CSV and XLS/XLSX files are accepted, parse them in memory using Node.js streams, and return the parsed data without saving any files to disk.
Create a new file for our engine:
import { PassThrough } from 'stream';
import * as fileType from 'file-type';
import { BadRequestException } from '@nestjs/common';
import { Request } from 'express';
import { Workbook } from 'exceljs';
import { createParserCsvOrXlsx } from './parser-factory.js';

const ALLOWED_MIME_TYPES = [
  'text/csv',
  'application/vnd.ms-excel',
  'text/comma-separated-values',
  'application/vnd.openxmlformats-officedocument.spreadsheetml.sheet',
  'application/vnd.ms-excel',
] as const;

export class CsvOrXlsxMulterEngine {
  private destKey: string;
  private maxFileSize: number;
  constructor(opts: { destKey: string; maxFileSize: number }) {
    this.destKey = opts.destKey;
    this.maxFileSize = opts.maxFileSize;
  }
  async _handleFile(req: Request, file: any, cb: any) {
    try {
      const contentLength = Number(req.headers['content-length']);
      if (
        typeof contentLength === 'number' &&
        contentLength > this.maxFileSize
      ) {
        throw new Error(`Max file size is ${this.maxFileSize} bytes.`);
      }
      const fileStream = await fileType.fileTypeStream(file.stream);
      const mime = fileStream.fileType?.mime ?? file.mimetype;
      if (!ALLOWED_MIME_TYPES.includes(mime)) {
        throw new BadRequestException('File must be *.csv or *.xlsx');
      }
      const replacementStream = new PassThrough();
      fileStream.pipe(replacementStream);
      const parser = createParserCsvOrXlsx(mime);
      const data = await parser.read(replacementStream);
      cb(null, {
        [this.destKey]:
          mime === 'text/csv' ? data : (data as Workbook).getWorksheet(),
      });
    } catch (error) {
      cb(error);
    }
  }
  _removeFile(req: Request, file: any, cb: any) {
    cb(null);
  }
}
This custom storage engine checks the file’s MIME type and ensures it’s either a CSV or XLS/XLSX file. It then processes the file entirely in memory using Node.js streams, so no temporary files are created on the server. This approach is both efficient and secure, especially when dealing with sensitive data.
Step 4: Creating the Parser Factory
The parser factory is responsible for determining the appropriate parser based on the file type.
Create a new file for our parser:
import excel from 'exceljs';

export function createParserCsvOrXlsx(mime: string) {
  const workbook = new excel.Workbook();
  return [
    'application/vnd.openxmlformats-officedocument.spreadsheetml.sheet',
    'application/vnd.ms-excel',
  ].includes(mime)
    ? workbook.xlsx
    : workbook.csv;
}
This factory function checks the MIME type and returns the appropriate parser (either xlsx or csv).
Step 5: Configuring Multer in the NestJS Controller
Next, let’s create a controller to handle file uploads using our custom storage engine.
Generate a new controller:
nest g controller files
In the files.controller.ts, configure the file upload using Multer and the custom storage engine:
import {
  Controller,
  Post,
  UploadedFile,
  UseInterceptors,
} from '@nestjs/common';
import { FileInterceptor } from '@nestjs/platform-express';
import { Worksheet } from 'exceljs';
import { CsvOrXlsxMulterEngine } from '../../shared/multer-engines/csv-xlsx/engine.js';
import { FilesService } from './files.service.js';

const MAX_FILE_SIZE_IN_MiB = 1000000000; // Only for test

@Controller('files')
export class FilesController {
  constructor(private readonly filesService: FilesService) {}
  @UseInterceptors(
    FileInterceptor('file', {
      storage: new CsvOrXlsxMulterEngine({
        maxFileSize: MAX_FILE_SIZE_IN_MiB,
        destKey: 'worksheet',
      }),
    }),
  )
  @Post()
  create(@UploadedFile() data: { worksheet: Worksheet }) {
    return this.filesService.format(data.worksheet);
  }
}
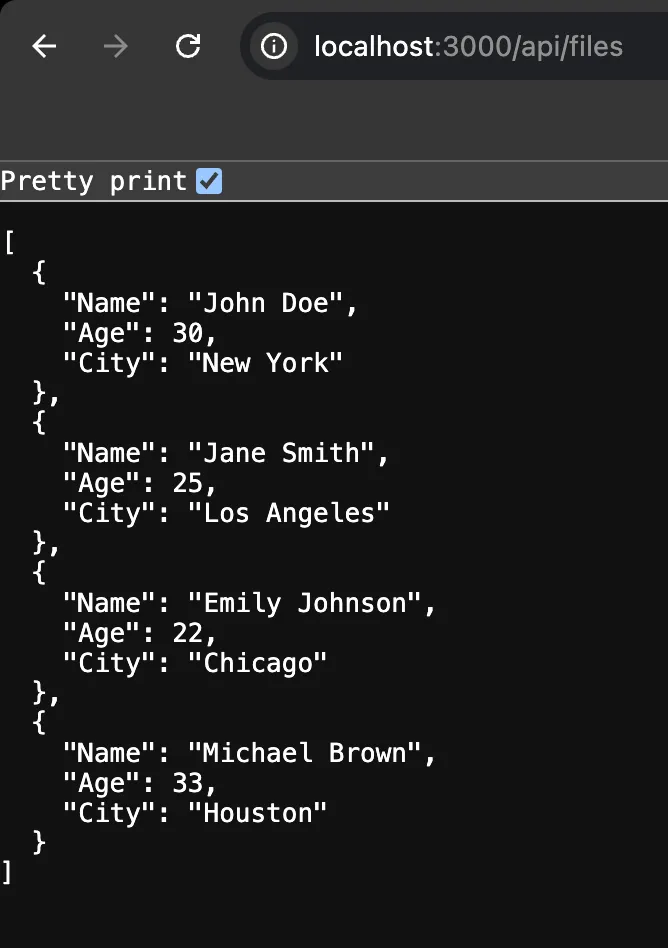
This controller sets up an endpoint to handle file uploads. The uploaded file is processed by the CsvOrXlsxMulterEngine, and the parsed data is returned in the response without ever being saved to disk.
Step 6: Setting Up the Module
Finally, we need to set up a module to include our controller.
Generate a new module:
nest g module files
In the files.module.ts, import the controller:
import { Module } from '@nestjs/common';
import { FilesController } from './files.controller.js';
import { FilesService } from './files.service.js';

@Module({
  providers: [FilesService],
  controllers: [FilesController],
})
export class FilesModule {}
Make sure to import this module into your AppModule:
Step 7: Testing the File Upload with HTML
To test the file upload functionality, we can create a simple HTML page that allows users to upload CSV or XLS/XLSX files. This page will send the file to our /api/files endpoint, where it will be parsed and processed in memory.
Here’s the basic HTML file for testing the file upload:
    File Upload


    Upload a File (CSV or XLSX)
To render the HTML page for file uploads, we first need to install an additional NestJS module called @nestjs/serve-static. You can do this by running the following command:
npm install @nestjs/serve-static
After installing, we need to configure this module in AppModule:
import { Module } from '@nestjs/common';
import { join } from 'path';
import { ServeStaticModule } from '@nestjs/serve-static';
import { FilesModule } from './modules/files/files.module.js';

@Module({
  imports: [
    FilesModule,
    ServeStaticModule.forRoot({
      rootPath: join(new URL('..', import.meta.url).pathname, 'public'),
      serveRoot: '/',
    }),
  ],
})
export class AppModule {}
This setup will allow us to serve static files from the public directory. Now, we can open the file upload page by navigating to http://localhost:3000 in your browser.
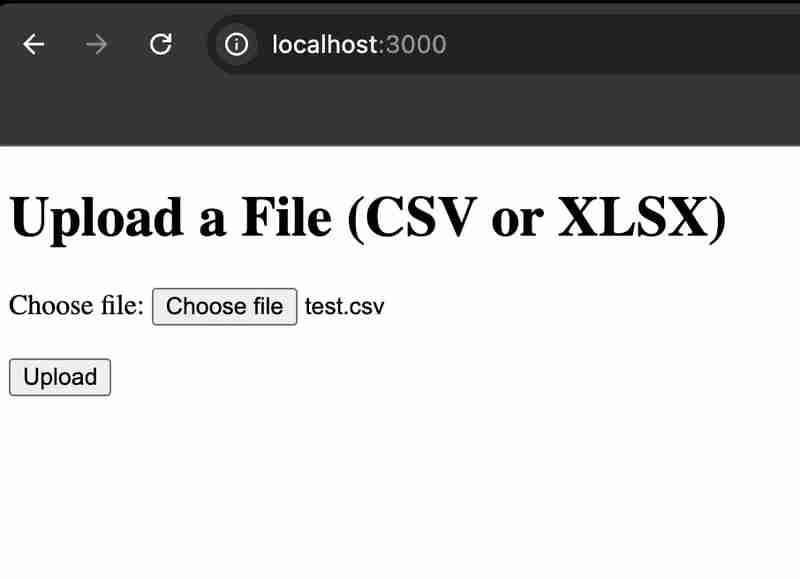
Upload Your File
To upload a file, follow these steps:
- Choose a file by clicking on the ‘Choose file’ button.
- Click on the ‘Upload’ button to start the upload process.
Once the file is uploaded successfully, you should see a confirmation that the file has been uploaded and formatted.
Note: I haven’t included code for formatting the uploaded file, as this depends on the library you choose for processing CSV or XLS/XLSX files. You can view the complete implementation on GitHub.
Comparing Pros and Cons of In-Memory File Processing
When deciding whether to use in-memory file processing or saving files to disk, it’s important to understand the trade-offs.
Pros of In-Memory Processing:
No Temporary Files on Disk:
- Security: Sensitive data isn’t left on the server’s disk, reducing the risk of data leaks.
- Resource Efficiency: The server doesn’t need to allocate disk space for temporary files, which can be particularly useful in environments with limited storage.
Faster Processing:
- Performance: Parsing files in memory can be faster since it eliminates the overhead of writing and reading files from disk.
- Reduced I/O Operations: Fewer disk I/O operations means lower latency and potent ially higher throughput for file processing.
Simplified Cleanup:
- No Cleanup Required: Since files aren’t saved to disk, there’s no need to manage or clean up temporary files, simplifying the codebase.
Cons of In-Memory Processing:
Memory Usage:
- High Memory Consumption: Large files can consume significant amounts of memory, which might lead to out-of-memory errors if the server doesn’t have enough resources.
- Scalability: Handling large files or multiple file uploads simultaneously may require careful memory management and scaling strategies.
File Size Limitations:
- Limited by Memory: The maximum file size that can be processed is limited by the available memory on the server. This can be a signific ant drawback for applications dealing with very large files.
Complexity in Error Handling:
- Error Management: Managing errors in streaming data can be more complex than handling files on disk, especially in cases where partial data might need to be recovered or analyzed.
When to Use In-Memory Processing:
Small to Medium Files: If your application deals with relatively small files, in-memory processing can offer speed and simplicity.
Security-Sensitive Applications: When handling sensitive data that shouldn’t be stored on disk, in-memory processing can reduce the risk of data breaches.
High-Performance Scenarios: Applications that require high throughput and minimal latency may benefit from the reduced overhead of in-memory processing.
When to Consider Disk-Based Processing:
Large Files: If your application needs to process very large files, disk-based processing may be necessary to avoid running out of memory.
Resource-Constrained Environments: In cases where server memory is limited, processing files on disk can prevent memory exhaustion and allow for better resource management.
Persistent Storage Needs: If you need to retain a copy of the uploaded file for auditing, backup, or later retrieval, saving files to disk is necessary.
Integration with External Storage Services: For large files, consider uploading them to external storage services like AWS S3, Google Cloud
- Storage, or Azure Blob Storage. These services allow you to offload storage from your server, and you can process the files in the cloud or retrieve them for in-memory processing as needed.
Scalability: Cloud storage solutions can handle massive files and provide redundancy, ensuring that your data is safe and easily accessible from multiple geographic locations.
Cost Efficiency: Using cloud storage can be more cost-effective for handling large files, as it reduces the need for local server resources and provides pay-as-you-go pricing.
Conclusion
In this article, we’ve created a custom file upload module in NestJS that handles CSV and XLS/XLSX files, parses them in memory, and returns the parsed data without saving any files to disk. This approach leverages the power of Node.js streams, making it both efficient and secure, as no temporary files are left on the server.
We’ve also explored the pros and cons of in-memory file processing versus saving files to disk. While in-memory processing offers speed, security, and simplicity, it’s important to consider the memory usage and potential file size limitations before adopting this approach.
Whether you’re building an enterprise application or a small project, handling file uploads and parsing correctly is crucial. With this setup, you’re well on your way to mastering file uploads in NestJS without worrying about unnecessary server storage or data security issues.
Feel free to share your thoughts and improvements in the comments section below!
If you enjoyed this article or found these tools useful, make sure to follow me on Dev.to for more insights and tips on coding and development. I regularly share helpful content to make your coding journey smoother.
Follow me on X (Twitter), where I share more interesting thoughts, updates, and discussions about programming and tech! Don't miss out - click those follow buttons.
You can also follow me on LinkedIn for professional insights, updates on my latest projects, and discussions about coding, tech trends, and more. Don't miss out on valuable content that can help you level up your development skills - let's connect!
-
 如何使用“ JSON”软件包解析JSON阵列?parsing JSON与JSON软件包 QUALDALS:考虑以下go代码:字符串 } func main(){ datajson:=`[“ 1”,“ 2”,“ 3”]`` arr:= jsontype {} 摘要:= = json.unmarshal([] byte(...编程 发布于2025-06-05
 -
在Pandas中如何将年份和季度列合并为一个周期列?pandas data frame thing commans date lay neal and pree pree'和pree pree pree”,季度 2000 q2 这个目标是通过组合“年度”和“季度”列来创建一个新列,以获取以下结果: [python中的concate...编程 发布于2025-06-05
-
CSS强类型语言解析您可以通过其强度或弱输入的方式对编程语言进行分类的方式之一。在这里,“键入”意味着是否在编译时已知变量。一个例子是一个场景,将整数(1)添加到包含整数(“ 1”)的字符串: result = 1 "1";包含整数的字符串可能是由带有许多运动部件的复杂逻辑套件无意间生成的。它也可以是故意从单个真理...编程 发布于2025-06-05
-
切换到MySQLi后CodeIgniter连接MySQL数据库失败原因Unable to Connect to MySQL Database: Troubleshooting Error MessageWhen attempting to switch from the MySQL driver to the MySQLi driver in CodeIgniter,...编程 发布于2025-06-05
-
为什么Microsoft Visual C ++无法正确实现两台模板的实例?The Mystery of "Broken" Two-Phase Template Instantiation in Microsoft Visual C Problem Statement:Users commonly express concerns that Micro...编程 发布于2025-06-05
-
如何将多种用户类型(学生,老师和管理员)重定向到Firebase应用中的各自活动?Red: How to Redirect Multiple User Types to Respective ActivitiesUnderstanding the ProblemIn a Firebase-based voting app with three distinct user type...编程 发布于2025-06-05
-
对象拟合:IE和Edge中的封面失败,如何修复?To resolve this issue, we employ a clever CSS solution that solves the problem:position: absolute;top: 50%;left: 50%;transform: translate(-50%, -50%)...编程 发布于2025-06-05
-
PHP SimpleXML解析带命名空间冒号的XML方法在php 很少,请使用该限制很大,很少有很高。例如:这种技术可确保可以通过遍历XML树和使用儿童()方法()方法的XML树和切换名称空间来访问名称空间内的元素。编程 发布于2025-06-05
-
可以在纯CS中将多个粘性元素彼此堆叠在一起吗?[2这里: https://webthemez.com/demo/sticky-multi-header-scroll/index.html </main> <section> { display:grid; grid-template-...编程 发布于2025-06-05
-
Go web应用何时关闭数据库连接?在GO Web Applications中管理数据库连接很少,考虑以下简化的web应用程序代码:出现的问题:何时应在DB连接上调用Close()方法?,该特定方案将自动关闭程序时,该程序将在EXITS EXITS EXITS出现时自动关闭。但是,其他考虑因素可能保证手动处理。选项1:隐式关闭终止数...编程 发布于2025-06-05
-
图片在Chrome中为何仍有边框?`border: none;`无效解决方案在chrome 中删除一个频繁的问题时,在与Chrome and IE9中的图像一起工作时,遇到了一个频繁的问题。和“边境:无;”在CSS中。要解决此问题,请考虑以下方法: Chrome具有忽略“ border:none; none;”的已知错误,风格。要解决此问题,请使用以下CSS ID块创建带...编程 发布于2025-06-05
-
查找当前执行JavaScript的脚本元素方法如何引用当前执行脚本的脚本元素在某些方案中理解问题在某些方案中,开发人员可能需要将其他脚本动态加载其他脚本。但是,如果Head Element尚未完全渲染,则使用document.getElementsbytagname('head')[0] .appendChild(v)的常规方...编程 发布于2025-06-05
-
Spark DataFrame添加常量列的妙招在Spark Dataframe ,将常数列添加到Spark DataFrame,该列具有适用于所有行的任意值的Spark DataFrame,可以通过多种方式实现。使用文字值(SPARK 1.3)在尝试提供直接值时,用于此问题时,旨在为此目的的column方法可能会导致错误。 df.withCo...编程 发布于2025-06-05
-
为什么不````''{margin:0; }`始终删除CSS中的最高边距?在CSS 问题:不正确的代码: 全球范围将所有余量重置为零,如提供的代码所建议的,可能会导致意外的副作用。解决特定的保证金问题是更建议的。 例如,在提供的示例中,将以下代码添加到CSS中,将解决余量问题: body H1 { 保证金顶:-40px; } 此方法更精确,避免了由全局保证金重置引...编程 发布于2025-06-05
-
在UTF8 MySQL表中正确将Latin1字符转换为UTF8的方法在UTF8表中将latin1字符转换为utf8 ,您遇到了一个问题,其中含义的字符(例如,“jáuòiñe”)在utf8 table tabled tablesset中被extect(例如,“致电。为了解决此问题,您正在尝试使用“ mb_convert_encoding”和“ iconv”转换受...编程 发布于2025-06-05


学习中文
- 1 走路用中文怎么说?走路中文发音,走路中文学习
- 2 坐飞机用中文怎么说?坐飞机中文发音,坐飞机中文学习
- 3 坐火车用中文怎么说?坐火车中文发音,坐火车中文学习
- 4 坐车用中文怎么说?坐车中文发音,坐车中文学习
- 5 开车用中文怎么说?开车中文发音,开车中文学习
- 6 游泳用中文怎么说?游泳中文发音,游泳中文学习
- 7 骑自行车用中文怎么说?骑自行车中文发音,骑自行车中文学习
- 8 你好用中文怎么说?你好中文发音,你好中文学习
- 9 谢谢用中文怎么说?谢谢中文发音,谢谢中文学习
- 10 How to say goodbye in Chinese? 再见Chinese pronunciation, 再见Chinese learning


