
使用 Express、MongoDB 和 Passport.js 實作 JWT 驗證
 瀏覽:732
Introduction
Secure authentication is a core concept in the development of modern web applications. Authentication is crucial in safeguarding user data and restricting access to certain resources. Authentication involves a series of processes that verify the identity of a user. There are various techniques of authentication, some include:
- Basic authentication
- API keys
- OAuth 2.0
- JWT (JSON Web Tokens)
- OpenID Connect
Each technique listed above has pros and cons, refer to article for a detailed explanation.
This article will focus on using JWTs for authentication. According to the docs:
JSON Web Token (JWT) is an open standard (RFC 7519) that defines a compact and self-contained way for securely transmitting information between parties as a JSON object.
JWTs are widely used for authentication because of their simplicity and scalability. In this tutorial, you will implement JWT authentication in an Express.js application, using MongoDB and the Passport.js library. By the end of this tutorial, you will create an authentication system with user registration, login, token refresh, and a protected route. You will create the following endpoints:
- POST /api/v1/auth/register: Registers a new user.
- POST /api/v1/auth/token: Authenticate a user and return a JWT.
- POST /api/v1/auth/token/refresh: Refreshes the JWT.
- POST /api/v1/auth/whoami: Protected route, that retrieves the details of the authentication user.
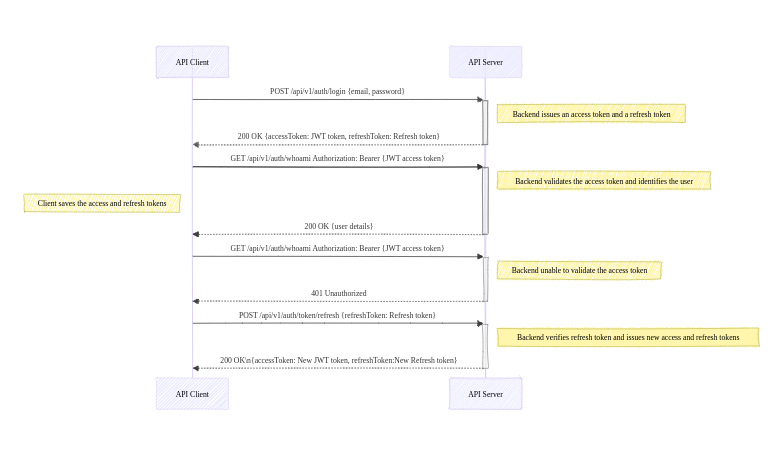
Authentication Workflow
The diagram below shows the authentication workflow for the application created in this tutorial:
Prerequisites
Before proceeding with the tutorial, ensure you have the following:
- You have Node.js and NPM installed on your computer.
- Basic knowledge of Express.js and MongoDB.
- You have Git installed on your computer.
- A MongoDB instance that runs locally or remotely (e.g. MongoDB Atlas).
- A code editor (e.g. VS Code).
Project Setup
For this tutorial, boilerplate code is available in the GitHub repository. Follow these steps to set up the boilerplate code for the application:
-
Run the command below to clone the repository:
git clone https://github.com/michaelikoko/express-passport-jwt-auth.git
-
Navigate to the starter directory:
cd express-passport-jwt-auth/starter
This is the folder structure for the starter directory:

-
Install the required dependencies:
npm install
-
Create a .env file in the current directory, and provide the application's port, MongoDB connection string, and the secret key used in signing tokens. The secret key is confidential and should be a random secure string. You can generate a secret key using OpenSSL:
openssl rand -base64 32
The .env should look like this:
PORT=3000
MONGODB_URI=mongodb srv://<username>:<password>@cluster1.menjafx.mongodb.net
SECRET=<your-secret-key>
-
Run the development server:
npm run dev
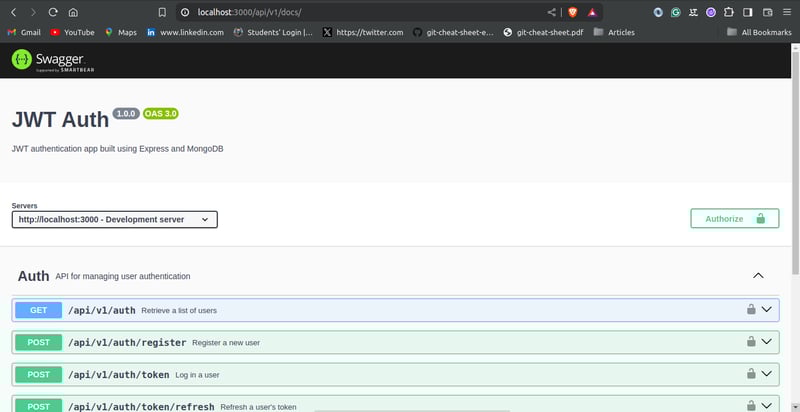
In a web browser, navigate to http://localhost:3000/api/v1/docs/ (replace with the appropriate port number) to access the Swagger documentation. This is an interactive interface that you can use to test the application.
Creating The User Schema
With the boilerplate code all set, you will need to create the schema for the user model. The user schema will be created using the mongoose library, and will include the following fields:
- email: The email field is unique to each user. It will function as the username.
- password: This field will contain a hash of the user's password. Storing passwords as plain text in the database poses significant security risks. To learn more about password hashing, you can check out this article.
- firstname: The user's first name.
- lastname: The user's last name.
In the models/User.js file, input the following:
const  mongoose  =  require("mongoose");
const  uniqueValidator  =  require("mongoose-unique-validator");

const userSchema = new mongoose.Schema(
  {
    email: {
      type: String,
      required: true,
      unique: true,
      trim: true
    },
    password: {
      type: String,
      required: true,
      trim: true,
      unique: true
    },
    firstName: {
      type: String,
      required: true,
      trim: true,
      minLength: [3, 'First Name too short'],
      maxLength: [50, 'First Name too long']
    },
    lastName: {
      type: String,
      required: true,
      trim: true,
      minLength: [3, 'Last Name too short'],
      maxLength: [50, 'Last Name too long']
    },
  },
  { timestamps: true }
);

userSchema.set('toJSON', {
  transform: (document,returnedObject) => {
    returnedObject.id  =  returnedObject._id.toString()
    delete returnedObject._id
    delete returnedObject.__v
    delete returnedObject.password  //do not reveal password
    delete returnedObject.createdAt
    delete returnedObject.updatedAt
  }
})

userSchema.plugin(uniqueValidator)

module.exports  =  mongoose.model('User', userSchema)
Creating Refresh Token Schema
To improve security, JWT access tokens will be short-lived. When they expire, the client application can use a valid refresh token to get new access tokens. This prevents the user from having to log in every time the access token expires.
In this tutorial, refresh tokens will be stored in the database. This will allow you to securely track and manage issued refresh tokens.
The schema for the refresh token will contain the following fields:
- token: The refresh token string. In this tutorial, it is a randomly generated UUIDv4 identifier.
- user: This field references the id of the user assigned to the refresh token. It establishes a many-to-one relationship with the User model.
- expiryDate: This field indicates when the refresh token will become invalid.
In the models/RefreshToken.js file, input the following:
const mongoose = require("mongoose");
const uniqueValidator = require("mongoose-unique-validator");
const refreshTokenSchema = new mongoose.Schema(
  {
    token: {
      type: String,
      required: true,
      unique: true,
      trim: true,
    },
    user: {
      type: mongoose.Schema.Types.ObjectId,
      ref: "User",
    },
    expiryDate: {
      type: Date,
      required: true,
    },
  },
  { timestamps: true }
);

refreshTokenSchema.plugin(uniqueValidator);

module.exports = mongoose.model("RefreshToken", refreshTokenSchema);
Configuring Passport.js
Passport.js is a well-known authentication library for Node.js. Passport.js is described in the docs as:
Simple, unobtrusive authentication for Node.js
Passport.js provides a set of different authentication strategies, such as JWT, and Oauth2, as well as social login using Google, Facebook, GitHub, and many more.
In this tutorial, you will configure the passport-jwt and passport-http strategies.
Install Passport
To make use of the Passport.js library, you need to first install passport and the passport-jwt and passport-http strategies:
npm install passport passport-jwt passport-http
Create Helper Functions
Before configuring Passport.js, you need to create helper functions for hashing and comparing passwords. As stated earlier in the article, a hash of the user's password will be saved in the database. The bcrypt library can be used to hash passwords.
Install bcrypt using:
npm install bcrypt
In the utils/helper.js file, input the following:
const bcrypt = require("bcrypt");
const saltRounds = 10;

async function hashPassword(password) {
  const salt = await bcrypt.genSalt(saltRounds);
  const passwordHash = await bcrypt.hash(password, salt);
  return passwordHash;
}

async function comparePassword(password, hashPassword) {
  return await bcrypt.compare(password, hashPassword);
}

module.exports = {
  hashPassword,
  comparePassword
};
Create Configuration File
In the middleware directory, create a file named passport.js. The file will contain the code necessary for configuring the authentication strategies. The middleware/passport.js file has the following content:
const passport = require("passport");
const PassportJWT = require("passport-jwt");
const PassportHttp = require("passport-http");
const config = require("../utils/config");
const User = require("../models/User");
const helper = require("../utils/helper");

const options = {
  jwtFromRequest: PassportJWT.ExtractJwt.fromAuthHeaderAsBearerToken(),
  secretOrKey: config.SECRET,
};

passport.use(
  new PassportJWT.Strategy(options, async (payload, done) => {
    try {
      const user = await User.findOne({ _id: payload.id });
      if (user) {
        return done(null, user);
      } else {
        return done(null, false);
      }
    } catch (error) {
      return done(error);
    }
  })
);

passport.use(
  new PassportHttp.BasicStrategy( async (userid, password, done) => {
    try {
      const user = await User.findOne({ email: userid });
      if (!user) {
        return done(null, false);
      }
      const isPasswordCorrect = await helper.comparePassword(password, user.password)
      if (!isPasswordCorrect) {
        return done(null, false);
      }
      return done(null, user);
    } catch (error) {
      return done(error);
    }
  })
);

module.exports = passport;
You start by requiring the passport library, passport-jwt strategy, passport-http strategy, the User schema, the helper functions, and the config object which reads the secret key set in the .env file.
JWT Strategy
To set up an authentication strategy, you pass the strategy instance into the passport.use() method. The passport-jwt strategy instance is constructed using:
new PassportJWT.Strategy(options, verify)
The constructor has two parameters:
-
options: The options parameter is an object that controls token extraction. The options have several properties, visit the docs for a comprehensive list. In this tutorial, you only made use of the two required object properties:
- secretOrKey: The value of the secretOrKey property is a string containing the secret key used for signing the token.
- jwtFromRequest: A function that accepts a request as a parameter, and extracts and returns the JWT. The passport-jwt strategy provides a couple of inbuilt extractors. To extract the token from the authorization header with the scheme 'bearer', you make use of the fromAuthHeaderAsBearerToken() extractor. Visit the docs for all included extractors.
-
verify: The verify parameter is a function with two parameters verify(payload, done):
- payload: An object that contains the decoded JWT payload.
- done: A passport error first callback function accepting arguments done(error, user, info).
In the verify function, you check if the id provided in the JWT payload matches any user in the database. This is done using User.findOne({ _id: payload.id }).
If the id belongs to a registered user, you call the done function with no error and the user details:
return done(null, user);
If the id doesn't belong to a registered user in the database, you call the done function with no error, and a false value for the user:
return done(null, false);
If the search fails, and an error occurs, you call the done function with the corresponding value for the error:
return done(error);
When called successfully, the done function attaches the user's details to the request object.
Basic Strategy
Passport.js HTTP Basic authentication strategy verifies users using a user ID, which is an email in this tutorial, and a password. The passport-http strategy constructors require a verify callback function:
new PassportHttp.BasicStrategy(verify)
The verify callback function has three parameters:
- userid
- password
- done
In the verify callback function, you check if the email provided belongs to a registered user. This is done using:
User.findOne({ email: userid })
If the user exists, you then compare the provided password to the stored hashed password. Here, you make use of the comparePassword helper function:
helper.comparePassword(password, user.password)
The done callback function is called appropriately.
Initialize Passport
After creating the configuration, you need to initialize Passport.js authentication modules as middleware in your main application file, app.js.
To initialize Passport.js as a middleware in your application, first require the passport library from the configuration file, /middleware/passport.js. Then, you make use of Passport's built-in middleware function:
passport.initialize()
Modify the app.js file as follows:
// ...

//import middleware
// ...
const passport = require("./middleware/passport");
// ...

//middleware
// ...
app.use(passport.initialize());
// ...
User Registration Endpoint
In this part of the tutorial, you will create two endpoints:
GET /api/v1/auth: An endpoint that lists all users in the database.
POST /api/v1/auth/register: An endpoint that allows the registration of new users.
The boilerplate code has already taken care of routing, error handling using express-async-errors, and request body validation using express-validator. This means your main focus will be on the controller's logic.
To begin, require the User schema and the helper functions in the controllers/auth.js file:
const User = require("../models/User");
const helper = require("../utils/helper");
// ...
List Users
In the controllers/auth.js file, add the following lines of code to the listUsers function:
//...
async function listUsers(req, res) {
  const users = await User.find({}).exec();
  return res.status(200).json(users);
}
// ...
The listUsers function is pretty straightforward, it queries and returns all users in the database.
Create Users
The code for creating users is implemented in the createUser function. Edit the controllers/auth.js file as follows:
// ...
async function createUser(req, res) {
  const { email, firstName, lastName, password } = req.body;
  const passwordHash = await helper.hashPassword(password);
  const user = await User.create({
    email,
    firstName,
    lastName,
    password: passwordHash,
  });
  return res.status(201).json(user);
}
// ...
The createUser controller first extracts the email, firstName, lastName, and password from the request body. It then hashes the password provided using the helper.hashPassword function and creates a new user in the database.
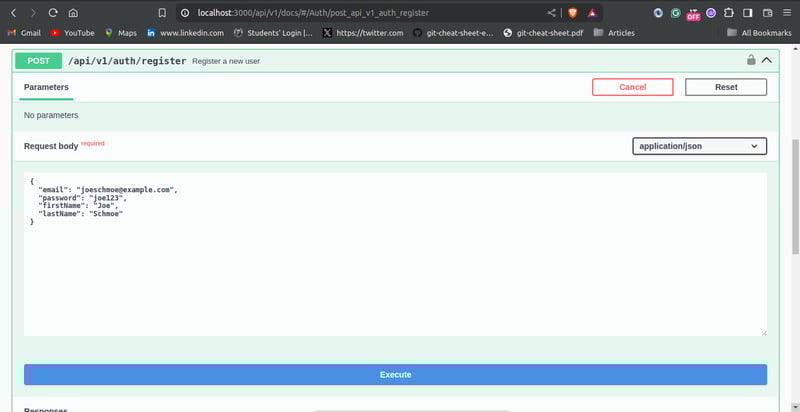
Testing the User Registration Endpoint
You can navigate to http://localhost:3000/api/v1/docs/ (ensure the appropriate port number is used) to test the user registration endpoints using Swagger UI.
Creating a new user should appear as follows:
Testing the list user endpoint should show the user you created:

User Authentication Endpoint
In this step of the tutorial, you will create the user authentication endpoint. The /api/v1/auth/token endpoint allows users to log in to the application by verifying the credentials provided.
More Helper Functions
Before creating the login endpoint, you need to create three more helper functions:
-
issueAccessToken: This function generates and returns a signed JWT. The payload is passed as a parameter.
You can use the jsonwebtoken library to create JWTs. Install the jsonwebtoken library using:
npm install jsonwebtoken
-
createRefreshToken: This function creates a new refresh token. The user ID is passed as a parameter.
To generate a random UUIDv4 string as the token value, you can use the uuid library. Install the library using:
npm install uuid
-
verifyRefreshTokenExpiration: This function checks whether a given refresh token is expired.
Edit the utils/helper.js file as follows:
const bcrypt = require("bcrypt");
const jwt = require("jsonwebtoken");
const config = require("./config");
const { v4: uuidv4 } = require('uuid');
const RefreshToken = require("../models/RefreshToken");

const saltRounds = 10;

async function hashPassword(password) {
    // ...
}

async function comparePassword(password, hashPassword) {
// ...
}

function issueAccessToken(payload) {
    return jwt.sign(payload, config.SECRET, { expiresIn: 60 * 2}); //2 mins validity
}

async function createRefreshToken(userId) {
    let expiryDate = new Date()
    expiryDate.setSeconds(60 * 60 *24) //24 hours validity
    const token = uuidv4()
    const refreshToken = await RefreshToken.create({
        token,
        user: userId,
        expiryDate: expiryDate.getTime()
    })
    return refreshToken.token
}

function verifyRefreshTokenExpiration (token) {
    return token.expiryDate.getTime()
Login Controller
The loginUser controller, in the controllers/auth.js file, contains the logic for the user authentication endpoint. Modify the controllers/auth.js file as shown below:
// ...
async function listUsers(req, res) {
    // ...
}

async function createUser(req, res) {
    // ...
}

async function loginUser(req, res) {
  const { email, password } = req.body;
  const user = await User.findOne({ email });

  if (!user) {
    return res.status(401).json({ error: "Invalid Email" });
  }

  const isPasswordCorrect = await helper.comparePassword(
    password,
    user.password
  );

  if (!isPasswordCorrect) {
    return res.status(401).json({ error: "Invalid Password" });
  }

  const payload = {
    email: user.email,
    id: user.id,
  };

  const accessToken = helper.issueAccessToken(payload);
  const refreshToken = await helper.createRefreshToken(user.id);
  return res.status(200).json({
    accessToken,
    refreshToken,
  });
}
// ...
The loginUser controller extracts the login credentials, i.e. email and password from the request body. The function searches for the user in the database with the given email. If no user is found, it returns an error with the 401 Unauthorized status code.
The function proceeds to compare the password provided with the password hash stored in the database using the helper.comparePassword function earlier created. If the passwords don't match, it returns a 401 Unauthorized error, with the appropriate error message.
After the user has been successfully verified, the function creates the payload for the JWT. The payload will contain the user's email and id. It generates a JWT access token using the helper function issueAccessToken passing the payload as a parameter. It also generates a refresh token using the helper function issueRefreshToken. The loginUser controller then returns both tokens as a response.
Testing the User Authentication Endpoint
You can proceed to test the login endpoint using Swagger UI. Passing a valid email and password should give you a response like this:

Token Refresh
As mentioned earlier, access tokens will be short-lived and users will be able to get new access tokens using refresh tokens. This feature will allow users to maintain their authenticated sessions without having to log in again.
In this section, you will write the controller logic for implementing refresh tokens. Add the following code to the controllers/auth.js file:
// ...

const  RefreshToken  =  require("../models/RefreshToken");
async function listUsers(req, res) {
    // ...
}

async function createUser(req, res) {
    // ...
}

async function loginUser(req, res) {
    // ...
}

async function refreshToken(req, res) {
  const { refreshToken: refreshTokenUUID } = req.body;
  const refreshToken = await RefreshToken.findOne({
    token: refreshTokenUUID,
  }).populate("user");

  if (!refreshToken) {
    return res.status(404).json({ error: "invalid refresh token"
    });
  }

  const isExpired = helper.verifyRefreshTokenExpiration(refreshToken);

  if (isExpired) {
    await RefreshToken.findByIdAndDelete(refreshToken._id).exec();
    return res.status(403).json({ error: "Refresh token is expired" });
  }

  const payload = {
    email: refreshToken.user.email,
    id: refreshToken.user.id,
  };

  await RefreshToken.findByIdAndDelete(refreshToken._id).exec();
  const newAccessToken = helper.issueAccessToken(payload);
  const newRefreshToken = await helper.createRefreshToken(payload.id);

  return res.status(200).json({
    accessToken: newAccessToken,
    refreshToken: newRefreshToken,
  });
}

// ...
The refreshToken function first extracts the UUIDv4 refresh token passed by the user from the request body. It then searches the database for the token provided by the user. This is done using the RefreshToken.findOne method. The user data associated with the token is retrieved using the .populate("user") method. The user data will be necessary when creating the payload object for a new access token. If the refresh token does not exist in the database, an error with the 404 Not Found status is returned.
The refreshToken controller proceeds to check if the token is expired using the verifyRefreshTokenExpiration helper function. If the token is expired, it is deleted from the database, and an error with 403 Forbidden status is returned.
The function creates the payload object with the user's email and id.
The refresh token rotation technique helps to improve security. It ensures that refresh tokens can only be used once. To invalidate the refresh token after use, the refreshToken function deletes the old refresh token. The function generates a new access token and refresh token using the issueAccessToken and createRefreshToken helper functions. The function then returns the generated tokens to the client.
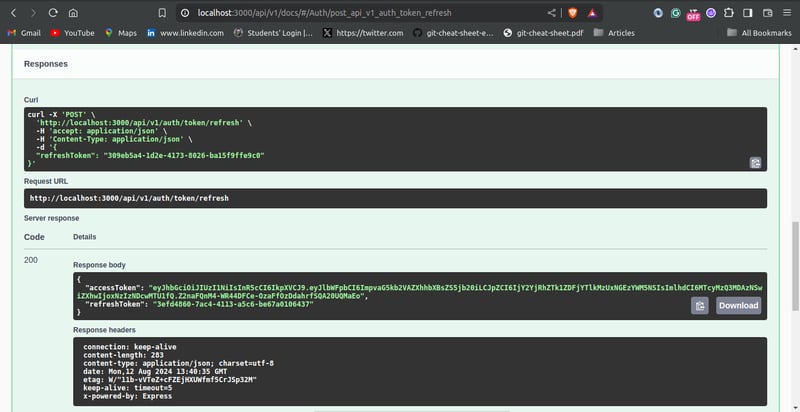
Testing the Token Refresh Endpoint
You can test the refresh token passing endpoint using Swagger UI. Passing a valid token should give a result that looks like this:
Protected Route
Protected routes are endpoints that can only be accessed by authenticated users. They can be crucial for securing sensitive information and restricting certain actions.
To test the authentication system you just built, you are going to create a protected route. In this tutorial, it is just going to be a simple route that returns the details of the authenticated user.
In the controllers/auth.js file, create the whoami controller function:
// ...

async function listUsers(req, res) {
    // ...
}

async function createUser(req, res) {
    // ...
}

async function loginUser(req, res) {
    // ...
}

async function refreshToken(req, res) {
    // ...
}

async function whoami(req, res) {
  return res.status(200).json(req.user);
}

//...
To use the Passport.js library to create protected routes, add the passport.authenticate middleware is to the route definition. Edit the routes/auth.js as follows:
// ...
const  passport  =  require("../middleware/passport");

//...
router
  .route("/whoami")
  .get(passport.authenticate(["jwt", "basic"], { session: false }), whoami);

module.exports = router;
In the passport.authenticate pass a list of the authentication strategies used as the first parameter. In this application, you made use of the JWT strategy and basic authentication. Therefore, you pass the list: [ "jwt", "basic"].
The { session: false } option tells Passport.js not to maintain a session. This is done because JWT authentication is stateless.
Testing the Protected Route
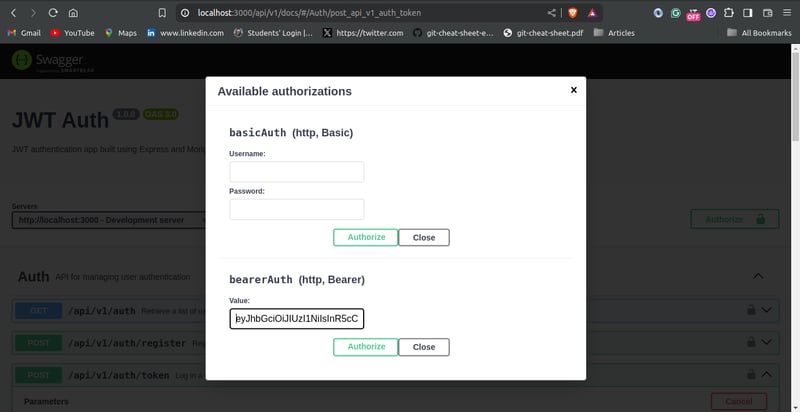
You can test the protected route using Swagger UI. First, log in to obtain a valid access user token using the /api/v1/auth/token endpoint. Then click on the “Authorize” button in the Swagger UI, pass the access token into the input box under “bearer Auth”, and click the “Authorize” button. This ensures that subsequent requests made with Swagger UI will have the token passed in the request header.
Testing the /api/v1/auth/whoami endpoint should look like this:

Conclusion
In this tutorial, you implemented JWT authentication in an Express.js application using the Passport.js library, and MongoDB.
You started by exploring the workflow for JWT authentication. You proceeded to create the necessary schemas. Furthermore, you configured the Passport.js library for both JWT and basic authentication. You also created the controller logic for user registration, user authentication, token refresh, and protected route endpoints. You also tested the endpoints using the Swagger UI interactive interface.
This article should give you a solid foundation for securing APIs built in Express.js using JWT and Passport.js. For further improvements, you should consider sending tokens as HTTP-only cookies, email verification for users, and password reset endpoint.
References
Passport.js Documentation
MongoDB Documentation
Express.js Documentation
Mongoose Documentation
JWT docs
jsonwebtoken package
Bcrypt package
uuid package
-
 為什麼不使用CSS`content'屬性顯示圖像?在Firefox extemers屬性為某些圖像很大,&& && && &&華倍華倍[華氏華倍華氏度]很少見,卻是某些瀏覽屬性很少,尤其是特定於Firefox的某些瀏覽器未能在使用內容屬性引用時未能顯示圖像的情況。這可以在提供的CSS類中看到:。 googlepic { 內容:url(&...程式設計 發佈於2025-05-10
 -
編譯器報錯“usr/bin/ld: cannot find -l”解決方法錯誤:“ usr/bin/ld:找不到-l “ 此錯誤表明鏈接器在鏈接您的可執行文件時無法找到指定的庫。為了解決此問題,我們將深入研究如何指定庫路徑並將鏈接引導到正確位置的詳細信息。 添加庫搜索路徑的一個可能的原因是,此錯誤是您的makefile中缺少庫搜索路徑。要解決它,您可以在鏈接器命令中添...程式設計 發佈於2025-05-10
-
Python中嵌套函數與閉包的區別是什麼嵌套函數與python 在python中的嵌套函數不被考慮閉合,因為它們不符合以下要求:不訪問局部範圍scliables to incling scliables在封裝範圍外執行範圍的局部範圍。 make_printer(msg): DEF打印機(): 打印(味精) ...程式設計 發佈於2025-05-10
-
在PHP中如何高效檢測空數組?在PHP 中檢查一個空數組可以通過各種方法在PHP中確定一個空數組。如果需要驗證任何數組元素的存在,則PHP的鬆散鍵入允許對數組本身進行直接評估:一種更嚴格的方法涉及使用count()函數: if(count(count($ playerList)=== 0){ //列表為空。 } 對...程式設計 發佈於2025-05-10
-
如何從Python中的字符串中刪除表情符號:固定常見錯誤的初學者指南?從python import codecs import codecs import codecs 導入 text = codecs.decode('這狗\ u0001f602'.encode('utf-8'),'utf-8') 印刷(文字)#帶有...程式設計 發佈於2025-05-10
-
PHP SimpleXML解析帶命名空間冒號的XML方法在php 很少,請使用該限制很大,很少有很高。例如:這種技術可確保可以通過遍歷XML樹和使用兒童()方法()方法的XML樹和切換名稱空間來訪問名稱空間內的元素。程式設計 發佈於2025-05-10
-
如何同步迭代並從PHP中的兩個等級陣列打印值?同步的迭代和打印值來自相同大小的兩個數組使用兩個數組相等大小的selectbox時,一個包含country代碼的數組,另一個包含鄉村代碼,另一個包含其相應名稱的數組,可能會因不當提供了exply for for for the uncore for the forsion for for ytry...程式設計 發佈於2025-05-10
-
Java中如何使用觀察者模式實現自定義事件?在Java 中創建自定義事件的自定義事件在許多編程場景中都是無關緊要的,使組件能夠基於特定的觸發器相互通信。本文旨在解決以下內容:問題語句我們如何在Java中實現自定義事件以促進基於特定事件的對象之間的交互,定義了管理訂閱者的類界面。 以下代碼片段演示瞭如何使用觀察者模式創建自定義事件: args...程式設計 發佈於2025-05-10
-
為什麼PYTZ最初顯示出意外的時區偏移?與pytz 最初從pytz獲得特定的偏移。例如,亞洲/hong_kong最初顯示一個七個小時37分鐘的偏移: 差異源利用本地化將時區分配給日期,使用了適當的時區名稱和偏移量。但是,直接使用DateTime構造器分配時區不允許進行正確的調整。 example pytz.timezone(&#...程式設計 發佈於2025-05-10
-
在Java中如何為PNG文件添加坐標軸和標籤?如何用java 在現有png映像中添加軸和標籤的axes和labels如何註釋png文件可能具有挑戰性。與其嘗試可能導致錯誤和不一致的修改,不如建議在圖表創建過程中集成註釋。 使用JFReechArt import java.awt.color; 導入java.awt.eventqueue; 導...程式設計 發佈於2025-05-10
-
Python環境變量的訪問與管理方法Accessing Environment Variables in PythonTo access environment variables in Python, utilize the os.environ object, which represents a mapping of envir...程式設計 發佈於2025-05-10
-
為什麼不````''{margin:0; }`始終刪除CSS中的最高邊距?在CSS 問題:不正確的代碼: 全球範圍將所有餘量重置為零,如提供的代碼所建議的,可能會導致意外的副作用。解決特定的保證金問題是更建議的。 例如,在提供的示例中,將以下代碼添加到CSS中,將解決餘量問題: body H1 { 保證金頂:-40px; } 此方法更精確,避免了由全局保證金重置...程式設計 發佈於2025-05-10
-
解決MySQL插入Emoji時出現的\\"字符串值錯誤\\"異常Resolving Incorrect String Value Exception When Inserting EmojiWhen attempting to insert a string containing emoji characters into a MySQL database us...程式設計 發佈於2025-05-10
-
找到最大計數時,如何解決mySQL中的“組函數\”錯誤的“無效使用”?如何在mySQL中使用mySql 檢索最大計數,您可能會遇到一個問題,您可能會在嘗試使用以下命令:理解錯誤正確找到由名稱列分組的值的最大計數,請使用以下修改後的查詢: 計數(*)為c 來自EMP1 按名稱組 c desc訂購 限制1 查詢說明 select語句提取名稱列和每個名稱...程式設計 發佈於2025-05-10
-
如何避免Go語言切片時的內存洩漏?,a [j:] ...雖然通常有效,但如果使用指針,可能會導致內存洩漏。這是因為原始的備份陣列保持完整,這意味著新切片外部指針引用的任何對象仍然可能佔據內存。 copy(a [i:] 對於k,n:= len(a)-j i,len(a); k程式設計 發佈於2025-05-10


學習中文
- 1 走路用中文怎麼說? 走路中文發音,走路中文學習
- 2 坐飛機用中文怎麼說? 坐飞机中文發音,坐飞机中文學習
- 3 坐火車用中文怎麼說? 坐火车中文發音,坐火车中文學習
- 4 坐車用中文怎麼說? 坐车中文發音,坐车中文學習
- 5 開車用中文怎麼說? 开车中文發音,开车中文學習
- 6 游泳用中文怎麼說? 游泳中文發音,游泳中文學習
- 7 騎自行車用中文怎麼說? 骑自行车中文發音,骑自行车中文學習
- 8 你好用中文怎麼說? 你好中文發音,你好中文學習
- 9 謝謝用中文怎麼說? 谢谢中文發音,谢谢中文學習
- 10 How to say goodbye in Chinese? 再见Chinese pronunciation, 再见Chinese learning


