
如何使用 Resend 和 Zod 在 Next.js 中建立動態電子郵件聯絡表單
 瀏覽:830
Introduction
Next.js is a powerful full-stack framework that allows us to build applications with both frontend and backend features. It's very flexible and can be used for everything from simple static websites to complex web apps. Today, we will use Next.js to build an email contact form.
Forms are a key part of any website, letting users interact with the application. Whether it's for signing up, logging in, giving feedback, or collecting data, forms are vital for user experience. Without forms, a full-stack application wouldn't be able to gather and process user input properly.
In this blog, I will show you how to create an email contact form using Next.js, Resend, and Zod (for form validation). We will cover setting up the project, designing the form, handling form submissions, and creating a separate API route. By the end, you will know how to build and add forms to your Next.js apps, ensuring your web app works well and is easy to use.
So, without further delay, let's get started.
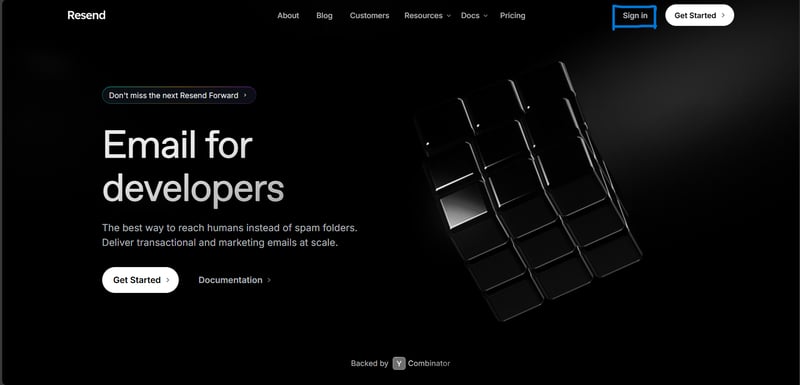
What is Resend?
Resend is a modern email API for developers. It's designed to make sending emails from your applications simple, reliable, and scalable. Unlike traditional email services, Resend is built with developers in mind, offering a straightforward API that integrates seamlessly with various programming languages and frameworks, including Next.js.
In our Next.js form project, we'll use Resend to send emails. When a user submits the form, we'll use Resend's API to send a confirmation email or process the form data as needed.
What is Zod?
Zod is a powerful tool for your data. It's a TypeScript-first library that helps you define and check the shape of your data. Think of it as setting rules for your data and then making sure the data matches those rules before you use it.
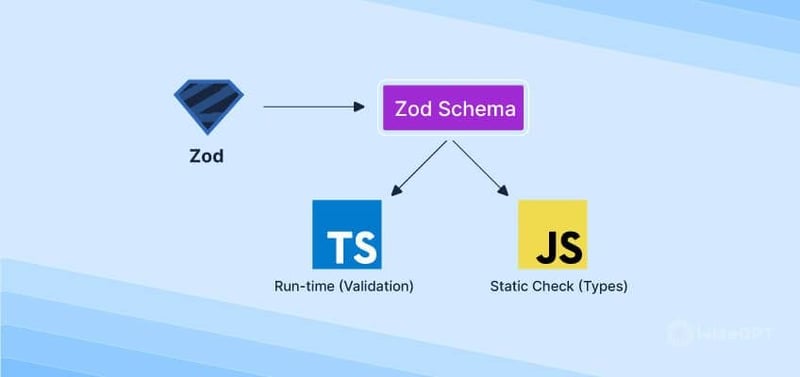
If you're using TypeScript (and if you're not, you should consider it!), Zod plays nicely with it. It can automatically infer TypeScript types from your schemas, which is a huge time-saver. While TypeScript checks types at compile-time, Zod does it at runtime. This means you can catch data issues that might slip through static type checking. You can use Zod for all sorts of data validation scenarios, from simple form inputs to complex API responses.
Project Setup
Let's start by setting up our Next.js project with all the necessary dependencies. We'll use TypeScript for type safety, Tailwind CSS for styling, Ant Design for UI components, Zod for form validation, and Resend for email functionality.
- Create a new Next.js project with TypeScript:
npx create-next-app@latest my-contact-form --typescript
cd my-contact-form
- Install additional dependencies:
yarn add antd zod resend react-icons
Setup Environment variables
For sending an email, we will use Resend, so we need the Resend API key. Before starting our server, let's go to Resend and get our API keys. Click here to go to the Resend site, and click the sign-in button.
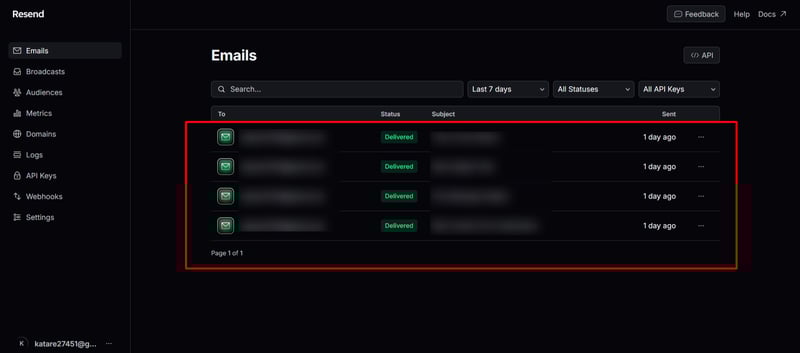
After signing in, you'll be redirected to this page. Here, you'll see all the emails you received from your form.
Here, click on the API Keys section
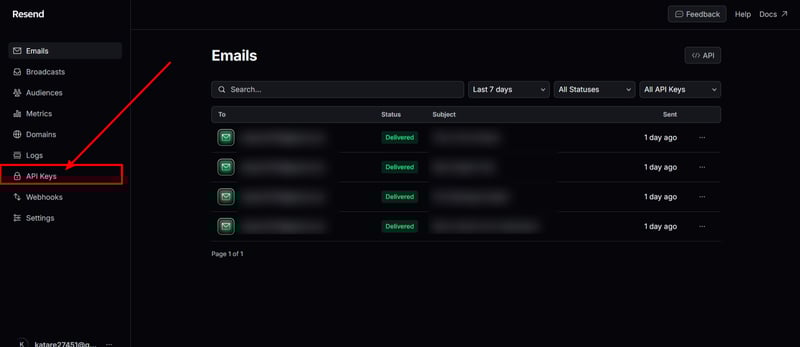
And, generate an API key by clicking on this ? button
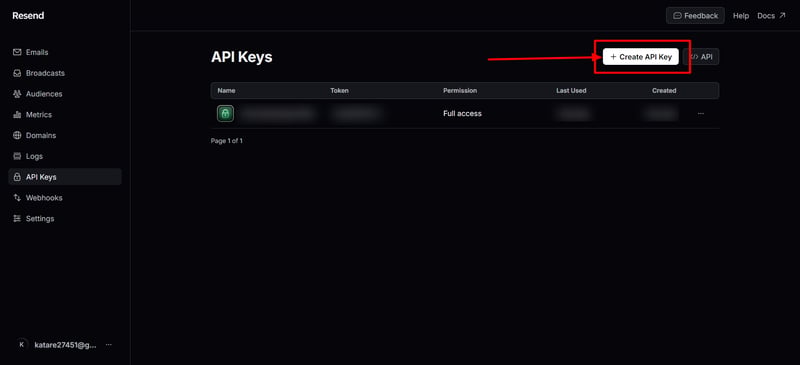
Now, copy that API key and keep it safe. Next, open VSCode and create a new file named .env in your root folder. Add an environment variable there.
RESEND_API_KEY=yourapikeywillbehere
Now you can also run your server using this command.
yarn dev
Email Template Component
Let's start by creating an email template. This will be the template you receive when someone sends you an email via the contact form.
import * as React from 'react';

interface EmailTemplateProps {
  firstName: string;
  message: string;
}

export const EmailTemplate: React.FC = ({
  firstName,
  message,
}) => (

    Hello, I am {firstName}!
    You have received a new message from your Portfolio:
    {message}

);
This simple React component defines the structure of the email that will be sent when someone submits the contact form. It takes two props: firstName and message. The component creates a personalized greeting using the first name and displays the submitted message.
Implementing Email Sending with Resend API
Here. we'll see how to implement email-sending functionality using the Resend API.
The Code Structure
First, let's look at where this code lives in our Next.js project:
app/
  ├── api/
  │   └── v1/
  │       └── send/
  │           └── route.ts
This structure follows Next.js 13's App Router convention, where API routes are defined as route handlers within the app directory.
This is our complete API route code ?
import { EmailTemplate } from 'app/components/email-template';
import { NextResponse } from 'next/server';
import { Resend } from 'resend';
import { v4 as uuid } from 'uuid';

const resend = new Resend(process.env.RESEND_API_KEY);

export async function POST(req: Request) {
  try {
    const { name, email, subject, message } = await req.json();

    const { data, error } = await resend.emails.send({
      from: 'Contact Form ',
      to: '[email protected]',
      subject: subject || 'New Contact Form Submission',
      reply_to: email,
      headers: {
        'X-Entity-Ref-ID': uuid(),
      },
      react: EmailTemplate({ firstName: name, message }) as React.ReactElement,
    });

    if (error) {
      return NextResponse.json({ error }, { status: 500 });
    }

    return NextResponse.json({ data, message: 'success' }, { status: 200 });
  } catch (error) {
    console.error('Error processing request:', error);
    return NextResponse.json({ error: 'Failed to process request' }, { status: 500 });
  }
}
Breaking Down the Code
Now, let's examine each part of the code:
import { EmailTemplate } from 'app/components/email-template';
import { NextResponse } from 'next/server';
import { Resend } from 'resend';
import { v4 as uuid } from 'uuid';
These import statements bring in the necessary dependencies:
- EmailTemplate: A custom React component for our email content(That we already built above.
- NextResponse: Next.js utility for creating API responses.
- Resend: The Resend API client.
- uuid: For generating unique identifiers.
const resend = new Resend(process.env.RESEND_API_KEY);
Here, we initialize the Resend client with our API key. It's crucial to keep this key secret, so we store it in an environment variable.
export async function POST(req: Request) {
  // ... (code inside this function)
}
This exports an async function named POST, which Next.js will automatically use to handle POST requests to this route.
const { name, email, subject, message } = await req.json();
We extract the form data from the request body. This assumes the client is sending a JSON payload with these fields.
const { data, error } = await resend.emails.send({
  from: 'Contact Form ',
  to: '[email protected]',
  subject: subject || 'New Contact Form Submission',
  reply_to: email,
  headers: {
    'X-Entity-Ref-ID': uuid(),
  },
  react: EmailTemplate({ firstName: name, message }) as React.ReactElement,
});
This is where we'll get our emails! We use Resend's send method to dispatch the email:
- from: The sender's email address.
- to: The recipient's email address.
- subject: The email subject, using the provided subject or a default.
- reply_to: Sets the reply-to address to the form submitter's email.
- headers: Includes a unique ID for tracking.
- react: Uses our custom EmailTemplate component to generate the email content.
if (error) {
  return NextResponse.json({ error }, { status: 500 });
}

return NextResponse.json({ data, message: 'success' }, { status: 200 });
Here, we handle the response from Resend. If there's an error, we return a 500 status with the error details. Otherwise, we send a success response.
catch (error) {
  console.error('Error processing request:', error);
  return NextResponse.json({ error: 'Failed to process request' }, { status: 500 });
}
This catch block handles any unexpected errors, logs them, and returns a generic error response.
And that's it! We've set up our API route. The only thing left is to set up our logic and UI. Let's do that too ?
Contact Page Component
In your app directory, create a new folder named contact-form and inside this folder, create a file named page.tsx.
app/
  ├── contact-form/
  │   └── page.tsx
Imports and Dependencies
First, import all necessary components from Ant Design, Next.js, and React Icons. We also import Zod for form validation.
import React from 'react';
import { Form, Input, Button, message, Space, Divider, Typography } from 'antd';
import Head from 'next/head';
import { FaUser } from 'react-icons/fa';
import { MdMail } from 'react-icons/md';
import { FaMessage } from 'react-icons/fa6';
import { z } from 'zod';
import Paragraph from 'antd/es/typography/Paragraph';
UI Layout and Design
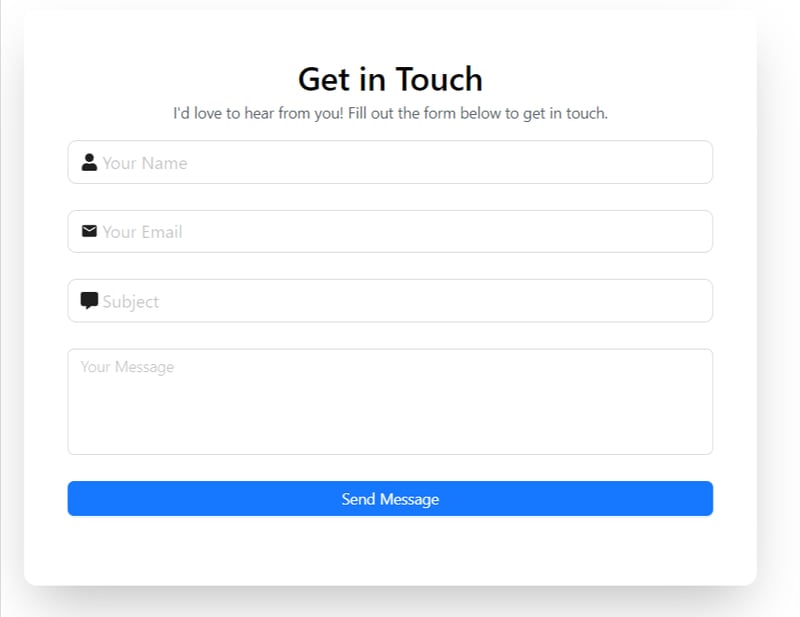
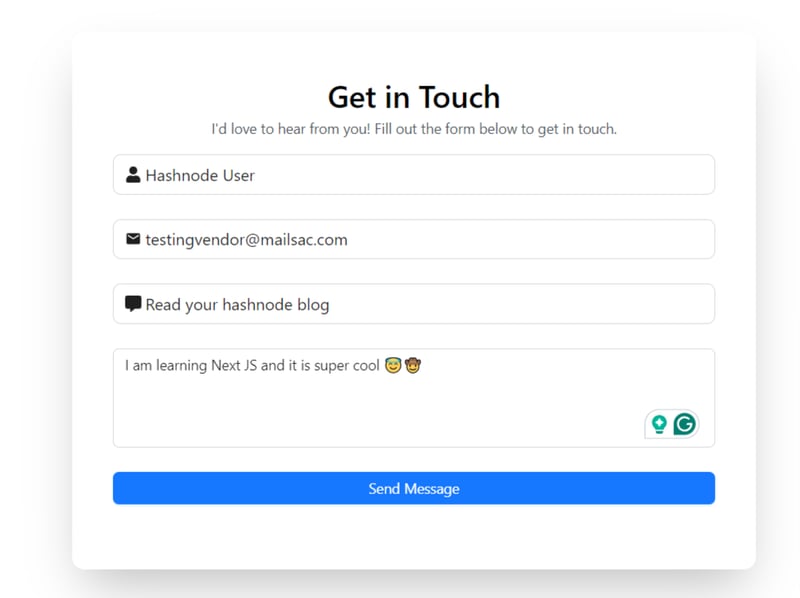
Now, let's create our UI, and then we'll move on to the logic. Our form will look something like this.?
In your page.tsx, after all the import statements, define a component and add a return statement first.
const ContactPage: React.FC = () => {
  return (

       /* our code will be here */

  );
};

export default ContactPage;
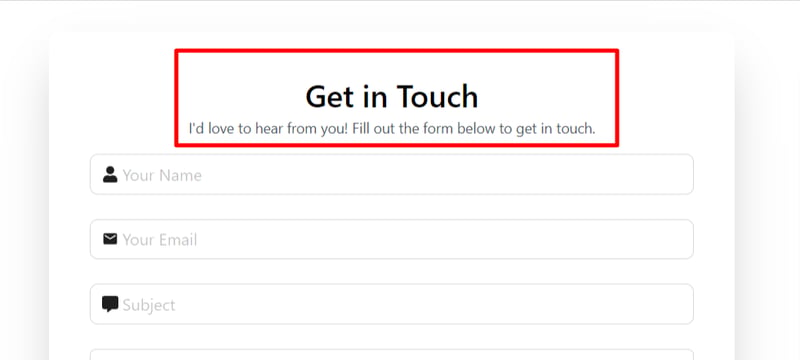
Currently, we have just a simple div with a few tailwind styling now, we'll first add our heading part.
...


          Get in Touch

            I'd love to hear from you! Fill out the form below to get in touch.


...
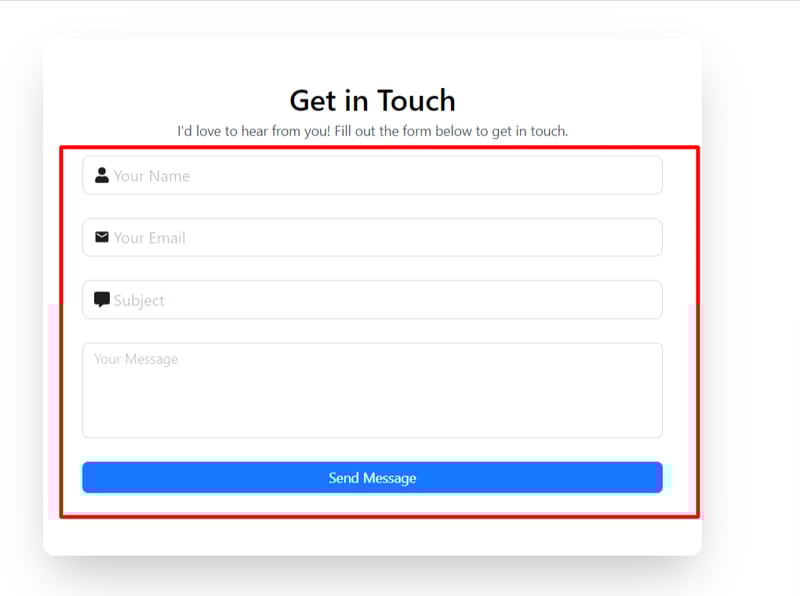
Now, let's add our input fields
...
Here, in the above code firstly we added a Form Component. This is the main Form component from Ant Design. It has the following props:
- form: Links the form to the form object created using Form.useForm().
- name: Gives the form a name, in this case, "contact".
- onFinish(we'll declare this function in our next section): Specifies the function to be called when the form is submitted successfully.
- layout: Sets the form layout to "vertical".
- className: Applies CSS classes for styling.
Then, we added a Form Items. Each Form.Item represents a field in the form. Let's look at the "name" field as an example.
- name: Specifies the field name.
- rules: An array of validation rules. Here, it's set as required.
- The Input component is used for text input, with a user icon prefix and a placeholder.
Similarly, we have Email and other fields.
This field has an additional rule to ensure the input is a valid email address.
Subject and Message Fields: These are similar to the name field, with the message field using a TextArea component for multi-line input.
Then, we have a Submit Button to submit our form
This is the submit button for the form. It's disabled when isSubmitting (we'll add this state in our next section) is true, and its text changes to "Sending..." during submission.
Form Submission Logic
So, in the logic part, we have a few things to do:
- Setting up Zod schema for form validation
- Adding new states
- and, implementing a onFinish function
We'll start with setting up our schema first.
// Zod schema for form validation
const contactSchema = z.object({
  name: z.string().min(4, 'Name must be at least 4 characters').max(50, 'Name must not exceed 50 characters'),
  email: z.string().email('Invalid email address').regex(/^[\w-\.] @([\w-] \.) [\w-]{2,4}$/, "Email must be a valid format"),
  subject: z.string().min(5, 'Subject must be at least 5 characters').max(100, 'Subject must not exceed 100 characters'),
  message: z.string().min(20, 'Message must be at least 20 characters').max(1000, 'Message must not exceed 1000 characters'),
});

type ContactFormData = z.infer;
This part defines a Zod schema for form validation. As we already learned, Zod is a TypeScript-first schema declaration and validation library. The contactSchema object defines the structure and validation rules for the contact form:
- name: Must be a string between 4 and 50 characters.
- email: Must be a valid email address and match the specified regex pattern.
- subject: Must be a string between 5 and 100 characters.
- message: Must be a string between 20 and 1000 characters.
The ContactFormData type is inferred from the Zod schema, providing type safety for the form data.
Now, let's add 2 new states and implement our onFinish function.
const ContactPage: React.FC = () => {
  const [form] = Form.useForm();
  const [isSubmitting, setIsSubmitting] = React.useState(false);

  const onFinish = async (values: ContactFormData) => {
    setIsSubmitting(true);
    try {
      contactSchema.parse(values);

      const response = await fetch('/api/v1/send', {
        method: 'POST',
        headers: {
          'Content-Type': 'application/json',
        },
        body: JSON.stringify(values),
      });

      if (!response.ok) {
        message.error('Failed to send message. Please try again.');
        setIsSubmitting(false);
      }

      const data = await response.json();

      if (data.message === 'success') {
        message.success('Message sent successfully!');
        setIsSubmitting(false);
        form.resetFields();
      } else {
        throw new Error('Failed to send message');
      }
    } catch (error) {
      if (error instanceof z.ZodError) {
        error.errors.forEach((err) => {
          message.error(err.message);
          setIsSubmitting(false);
        });
      } else {
        message.error('Failed to send message. Please try again.');
        setIsSubmitting(false);
      }
    } finally {
      setIsSubmitting(false);
    }
  };
This part defines the ContactPage functional component:
- It uses the Form.useForm hook to create a form instance.
- It manages a isSubmitting state to track form submission status.
- The onFinish function is called when the form is submitted:
- It sets isSubmitting to true.
- It uses contactSchema.parse(values) to validate the form data against the Zod schema.
- If validation passes, it sends a POST request to /api/v1/send with the form data.
- It handles the response, showing success or error messages accordingly.
- If there's a Zod validation error, it displays the error message.
- Finally, it sets isSubmitting back to false.
This setup ensures that the form data is validated on both the client-side (using Antd's form validation) and the server-side (using Zod schema validation) before sending the data to the server. It also manages the submission state and provides user feedback through success or error messages.
And, this is the complete code of our contact-form file ?
"use client";
import React from 'react';
import { Form, Input, Button, message, Space, Divider, Typography } from 'antd';
import Head from 'next/head';
import { FaUser } from 'react-icons/fa';
import { MdMail } from 'react-icons/md';
import { FaMessage } from 'react-icons/fa6';
import { z } from 'zod';
import { Container } from 'app/components/container';
import Paragraph from 'antd/es/typography/Paragraph';
const { TextArea } = Input;
const { Text } = Typography;
// Zod schema for form validation
const contactSchema = z.object({
name: z.string().min(4, 'Name must be at least 4 characters').max(50, 'Name must not exceed 50 characters'),
email: z.string().email('Invalid email address').regex(/^[\w-\.] @([\w-] \.) [\w-]{2,4}$/, "Email must be a valid format"),
subject: z.string().min(5, 'Subject must be at least 5 characters').max(100, 'Subject must not exceed 100 characters'),
message: z.string().min(20, 'Message must be at least 20 characters').max(1000, 'Message must not exceed 1000 characters'),
});
type ContactFormData = z.infer;
const ContactPage: React.FC = () => {
const [form] = Form.useForm();
const [isSubmitting, setIsSubmitting] = React.useState(false);
const onFinish = async (values: ContactFormData) => {
setIsSubmitting(true);
try {
contactSchema.parse(values);
const response = await fetch('/api/v1/send', {
method: 'POST',
headers: {
'Content-Type': 'application/json',
},
body: JSON.stringify(values),
});
if (!response.ok) {
message.error('Failed to send message. Please try again.');
setIsSubmitting(false);
}
const data = await response.json();
if (data.message === 'success') {
message.success('Message sent successfully!');
setIsSubmitting(false);
form.resetFields();
} else {
throw new Error('Failed to send message');
}
} catch (error) {
if (error instanceof z.ZodError) {
error.errors.forEach((err) => {
message.error(err.message);
setIsSubmitting(false);
});
} else {
message.error('Failed to send message. Please try again.');
setIsSubmitting(false);
}
} finally {
setIsSubmitting(false);
}
};
return (
Get in Touch
I'd love to hear from you! Fill out the form below to get in touch.
} placeholder="Your Name" size="large" />
} placeholder="Your Email" size="large" />
} placeholder="Subject" size="large" />
);
};
export default ContactPage;
Testing
Till now, we're all set, now it's time to run and test our application.
Start your server:
yarn dev
First, let's try to hit the endpoint without filling out the form. As expected, the API doesn't get called, and we receive error messages.

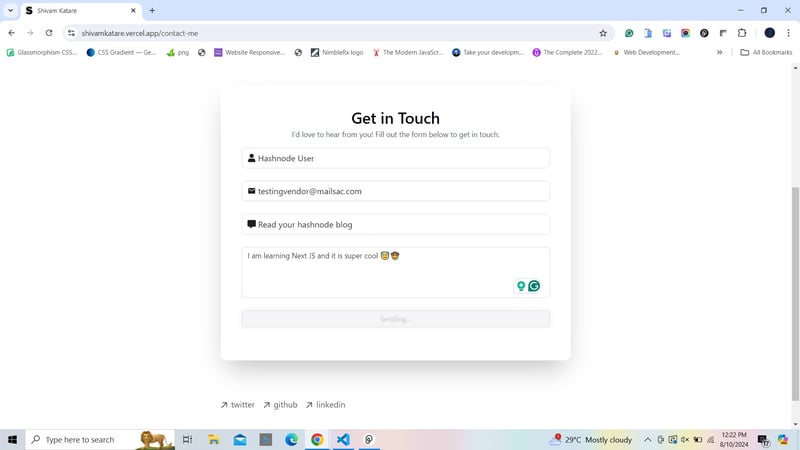
Now, let's fill out the form
and hit the send button. It's in process.
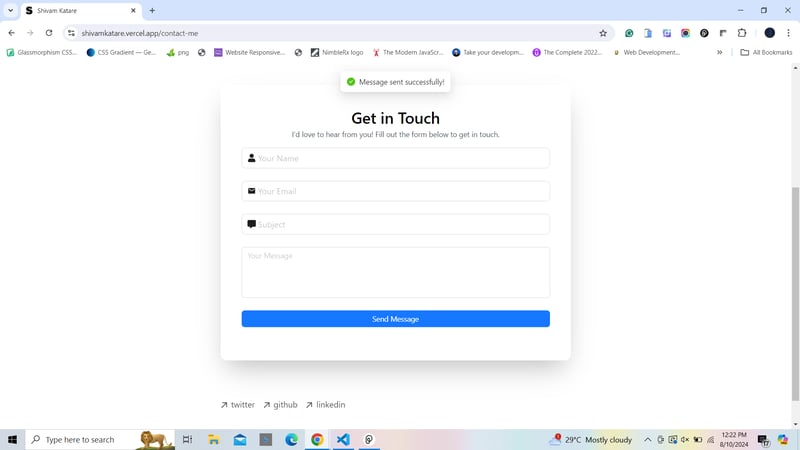
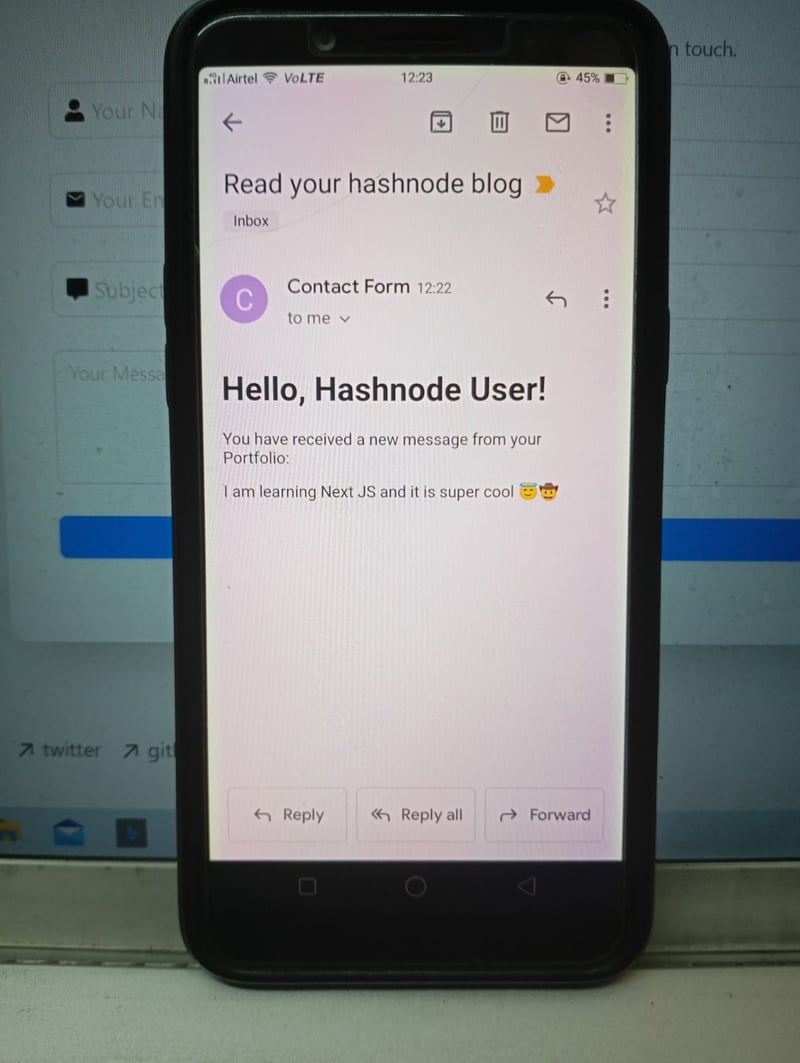
Here we go, the message is sent. The sender receives a notification saying "Message sent," and the form is also refreshed.
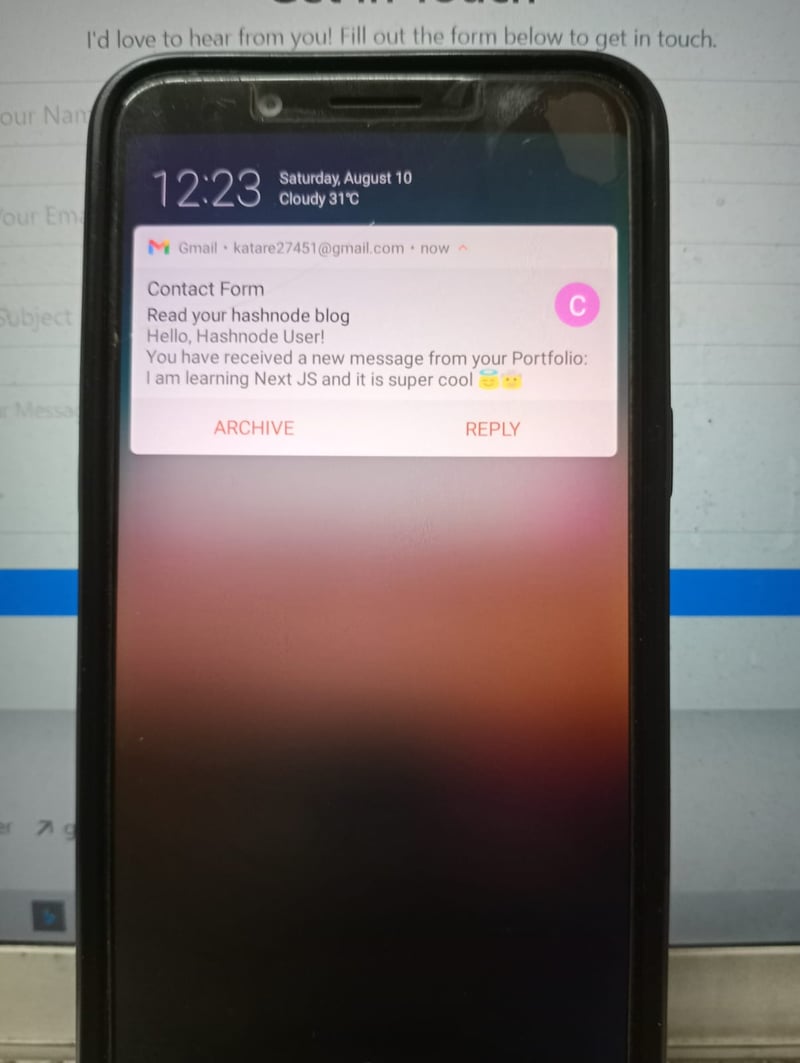
The receiver also gets the message?
And that's it. We have successfully built an email contact form in Next.js using Resend and Zod.
Conclusion
In this article, we built a contact form using Next.js and implemented features like form validation with Zod and email functionality with Resend. We start by setting up the Next.js project, configuring necessary dependencies, and managing environment variables for secure API access.
Then, we designed the email template, set up an API route for handling email submissions, and implemented the frontend form with Ant Design components.
If you want to see a live preview of it, you can check it out here. I have implemented the same form in my portfolio.
Thanks for reading this blog. If you learned something from it, please like and share it with your friends and community. I write blogs and share content on JavaScript, TypeScript, Open Source, and other web development-related topics. Feel free to follow me on my socials. I'll see you in the next one. Thank You :)
GitHub
-
 如何在Java中正確顯示“ DD/MM/YYYY HH:MM:SS.SS”格式的當前日期和時間?如何在“ dd/mm/yyyy hh:mm:mm:ss.ss”格式“ gormat 解決方案:的,請訪問量很大,並應為procectiquiestate的,並在整個代碼上正確格式不多: java.text.simpledateformat; 導入java.util.calendar; 導入java...程式設計 發佈於2025-06-05
 -
我可以將加密從McRypt遷移到OpenSSL,並使用OpenSSL遷移MCRYPT加密數據?將我的加密庫從mcrypt升級到openssl 問題:是否可以將我的加密庫從McRypt升級到OpenSSL?如果是這樣,如何? 答案:是的,可以將您的Encryption庫從McRypt升級到OpenSSL。 可以使用openssl。 附加說明: [openssl_decrypt()函數要求...程式設計 發佈於2025-06-05
-
在JavaScript中如何並發運行異步操作並正確處理錯誤?同意操作execution 在執行asynchronous操作時,相關的代碼段落會遇到一個問題,當執行asynchronous操作:此實現在啟動下一個操作之前依次等待每個操作的完成。要啟用並發執行,需要進行修改的方法。 第一個解決方案試圖通過獲得每個操作的承諾來解決此問題,然後單獨等待它們: c...程式設計 發佈於2025-06-05
-
Spark DataFrame添加常量列的妙招在Spark Dataframe ,將常數列添加到Spark DataFrame,該列具有適用於所有行的任意值的Spark DataFrame,可以通過多種方式實現。使用文字值(SPARK 1.3)在嘗試提供直接值時,用於此問題時,旨在為此目的的column方法可能會導致錯誤。 df.withCo...程式設計 發佈於2025-06-05
-
Java為何無法創建泛型數組?通用陣列創建錯誤 arrayList [2]; JAVA報告了“通用數組創建”錯誤。為什麼不允許這樣做? 答案:Create an Auxiliary Class:public static ArrayList<myObject>[] a = new ArrayList<my...程式設計 發佈於2025-06-05
-
Java中假喚醒真的會發生嗎?在Java中的浪費喚醒:真實性或神話? 在Java同步中偽裝喚醒的概念已經是討論的主題。儘管存在這種行為的潛力,但問題仍然存在:它們實際上是在實踐中發生的嗎? Linux的喚醒機制根據Wikipedia關於偽造喚醒的文章,linux實現了pthread_cond_wait()功能的Linux實現,...程式設計 發佈於2025-06-05
-
如何從PHP中的Unicode字符串中有效地產生對URL友好的sl。為有效的slug生成首先,該函數用指定的分隔符替換所有非字母或數字字符。此步驟可確保slug遵守URL慣例。隨後,它採用ICONV函數將文本簡化為us-ascii兼容格式,從而允許更廣泛的字符集合兼容性。 接下來,該函數使用正則表達式刪除了不需要的字符,例如特殊字符和空格。此步驟可確保slug僅包...程式設計 發佈於2025-06-05
-
可以在純CS中將多個粘性元素彼此堆疊在一起嗎?[2这里: https://webthemez.com/demo/sticky-multi-header-scroll/index.html </main> <section> { display:grid; grid-template-...程式設計 發佈於2025-06-05
-
PHP未來:適應與創新PHP的未來將通過適應新技術趨勢和引入創新特性來實現:1)適應云計算、容器化和微服務架構,支持Docker和Kubernetes;2)引入JIT編譯器和枚舉類型,提升性能和數據處理效率;3)持續優化性能和推廣最佳實踐。 引言在編程世界中,PHP一直是網頁開發的中流砥柱。作為一個從1994年就開始發展...程式設計 發佈於2025-06-05
-
左連接為何在右表WHERE子句過濾時像內連接?左JOIN CONUNDRUM:WITCHING小時在數據庫Wizard的領域中變成內在的加入很有趣,當將c.foobar條件放置在上面的Where子句中時,據說左聯接似乎會轉換為內部連接。僅當滿足A.Foo和C.Foobar標準時,才會返回結果。 為什麼要變形?關鍵在於其中的子句。當左聯接的右側...程式設計 發佈於2025-06-05
-
如何使用不同數量列的聯合數據庫表?合併列數不同的表 當嘗試合併列數不同的數據庫表時,可能會遇到挑戰。一種直接的方法是在列數較少的表中,為缺失的列追加空值。 例如,考慮兩個表,表 A 和表 B,其中表 A 的列數多於表 B。為了合併這些表,同時處理表 B 中缺失的列,請按照以下步驟操作: 確定表 B 中缺失的列,並將它們添加到表的...程式設計 發佈於2025-06-05
-
為什麼Microsoft Visual C ++無法正確實現兩台模板的實例?The Mystery of "Broken" Two-Phase Template Instantiation in Microsoft Visual C Problem Statement:Users commonly express concerns that Micro...程式設計 發佈於2025-06-05
-
如何在Java字符串中有效替換多個子字符串?在java 中有效地替換多個substring,需要在需要替換一個字符串中的多個substring的情況下,很容易求助於重複應用字符串的刺激力量。 However, this can be inefficient for large strings or when working with nu...程式設計 發佈於2025-06-05
-
為什麼使用固定定位時,為什麼具有100%網格板柱的網格超越身體?網格超過身體,用100%grid-template-columns 為什麼在grid-template-colms中具有100%的顯示器,當位置設置為設置的位置時,grid-template-colly修復了? 問題: 考慮以下CSS和html: class =“ snippet-code”> ...程式設計 發佈於2025-06-05
-
如何在Chrome中居中選擇框文本?選擇框的文本對齊:局部chrome-inly-ly-ly-lyly solument 您可能希望將文本中心集中在選擇框中,以獲取優化的原因或提高可訪問性。但是,在CSS中的選擇元素中手動添加一個文本 - 對屬性可能無法正常工作。 初始嘗試 state)</option> < o...程式設計 發佈於2025-06-05


學習中文
- 1 走路用中文怎麼說? 走路中文發音,走路中文學習
- 2 坐飛機用中文怎麼說? 坐飞机中文發音,坐飞机中文學習
- 3 坐火車用中文怎麼說? 坐火车中文發音,坐火车中文學習
- 4 坐車用中文怎麼說? 坐车中文發音,坐车中文學習
- 5 開車用中文怎麼說? 开车中文發音,开车中文學習
- 6 游泳用中文怎麼說? 游泳中文發音,游泳中文學習
- 7 騎自行車用中文怎麼說? 骑自行车中文發音,骑自行车中文學習
- 8 你好用中文怎麼說? 你好中文發音,你好中文學習
- 9 謝謝用中文怎麼說? 谢谢中文發音,谢谢中文學習
- 10 How to say goodbye in Chinese? 再见Chinese pronunciation, 再见Chinese learning


