
使用 Flight 建立簡單的部落格 - 第 1 部分
 瀏覽:898
Hey everyone! I figured it was time to showcase some of the new features that have been added to the Flight Framework for PHP. Earlier this year the original creator of Flight Mike Cao graciously offered to transfer ownership of mikecao/flight over to a new Flight PHP organization. Since it's been moved we've added features like middleware, route grouping, DIC, and other features. This post will be a little longer, but it's just because I've included a lot of code examples so you can have the right context into how your blog will get built.
First off, let's just get this out of the way. Flight is meant to be a simple framework with a few bells and whistles. It will not compete with Laravel or Symfony or Yii or Cake or [fill in the blank]. This framework is really built towards simple to medium size projects. It also caters to those who don't like "magic" in their code that's hard to understand or train to. It's geared more towards developers who are just starting to branch into frameworks instead of raw PHP with a lot of random include statements.
tl;dr
Lots of cool features, nice simple implementation, blah blah blah here's the code. Go to part 2 for the cool stuff!
Installation
Let's use Composer to get this party started.
composer create-project flightphp/skeleton blog/
cd blog/
Configure your New Project
First thing to do is to go to the app/config/config.php file where we can put any config like API keys, database credentials, and other important credentials for our app. For this blog, we'll uncomment the line with file_path for our SQLite database path:
return [
    'database' => [
        // 'host' => 'localhost',
        // 'dbname' => 'dbname',
        // 'user' => 'user',
        // 'password' => 'password'
        'file_path' => __DIR__ . $ds . '..' . $ds . 'database.sqlite'
    ],
];
Create the Blog Database
Flight now comes with a command line utility called runway. This allows you to create custom commands for a plugin for Flight, or even for your own project.
As part of the skeleton, it comes with a SampleDatabaseCommand that will give us a starting point with this blog project we are creating.
Run the below command and it should populate your database for you!
php runway init:sample-db
Next we'll open up the app/config/services.php file and uncomment the line for SQLite.
// see how the $config variable references the config line we uncommented earlier?
$dsn = 'sqlite:' . $config['database']['file_path'];
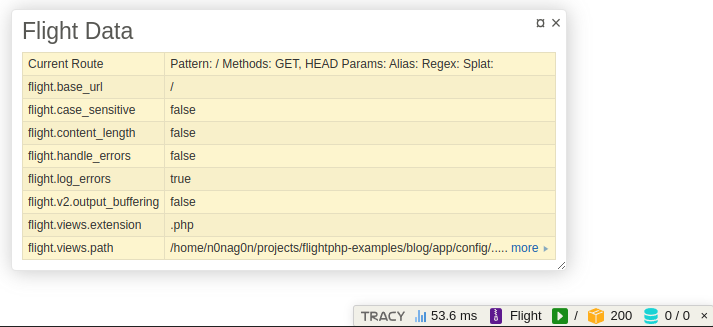
Just to make sure we've got everything setup correctly, run composer start and then go to http://localhost:8000/ in your browser. You should see the following screen:

You'll also notice in the corner you have a handy debug toolbar with some custom Flight panels to help you understand what's going on in your application. If you hover over the various items in the toolbar, you'll see a variety of hovers that you can click on to keep sticky on the page (more on that later).
Building the HTML Templates
Flight does come with a very basic HTML templating solution already in the framework. This is just fine for very simple sites or just to return a simple piece of HTML. It is recommended to use another templating platform such as Latte, Twig, or Blade. In this tutorial, we're going to use Latte because it is awesome and has no dependencies (you'll notice in Flight we do not like unnecessary dependencies)!
Go ahead and install Latte
composer require latte/latte
Add this to your services.php
$Latte = new \Latte\Engine;
$Latte->setTempDirectory(__DIR__ . '/../cache/');

// This is fun feature of Flight. You can remap some built in functions with the framework
// to your liking. In this case, we're remapping the Flight::render() method.
$app->map('render', function(string $templatePath, array $data = [], ?string $block = null) use ($app, $Latte) {
    $templatePath = __DIR__ . '/../views/'. $templatePath;
    $Latte->render($templatePath, $data, $block);
});
Now that we have a templating engine in place, we can create a base HTML file. Let's create a layout.latte file:
        {$page_title ? $page_title.' - '}Blog Built with Flight!


        {block content}{/block}
Active Record Database Class
Flight has a plugin for interacting with a database called Flight Active Record. This plugin helps you not write as much raw SQL in your apps (although sometimes it is more efficient to write a raw SQL query instead of forcing an active record/ORM/mapper to run it for you). Basically the active record extension helps you interact with rows within tables in your database: one row in a database can be mapped to an object in PHP (with autocomplete for the columns) saving time and sanity. Let's get it installed in our project.
composer require flightphp/active-record
Now you can use runway to create your active record classes automatically for you and it will create your properties as comments automatically (for autocomplete)!
First let's create the posts class. The first time you run this, it needs to setup the connection for the database.
$ php runway make:record posts
Database configuration not found. Please provide the following details:
Driver (mysql/pgsql/sqlite): sqlite
Database file path [database.sqlite]: app/database.sqlite
Username (for no username, press enter) []:
Password (for no password, press enter) []:
Writing database configuration to .runway-config.json
Creating directory app/records
Active Record successfully created at app/records/PostRecord.php
Now we'll create the comments record class:
$ php runway make:record comments
It's Time for your First Page!
Flight uses the MVC pattern. In order to create a new page you need to define a route in your routes.php file, create a new method in a controller, and then create the HTML file that the browser will serve. You can use runway to help you get started with a new controller class:
php runway make:controller Home
And you should see something similar to the following:
$ php runway make:controller Home
Controller successfully created at app/controllers/HomeController.php
If you go to app/controllers/HomeController.php go ahead and add this new method to your HomeController:
/**
 * Index
 *
 * @return void
 */
public function index(): void
{
    $this->app->render('home.latte', [ 'page_title' => 'Home' ]);
}
And create a new file in app/views/home.latte and put in this code:
{extends 'layout.latte'}
{block content}
My Home Page
{/block}
Finally let's change up the routes to the routes.php file. Go ahead and remove any code in the routes file that begins with $router-> and add a new route for your home router:
$router->get('/', \app\controllers\HomeController::class . '->index');
Make sure you run composer start so that your development server is up. If you go to http://localhost:8000/ in your browser, you should see something like this!
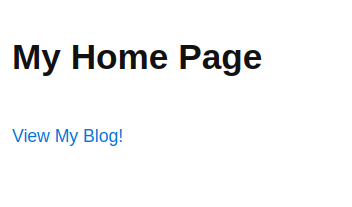
Now we're cookin'!
Adding Routes for the Blog
Let's go ahead and add all the methods in your controller, routes, and html files. Let's start with adding the routes in your routes.php file:
// Blog
$router->group('/blog', function(Router $router) {

    // Posts
    $router->get('', \app\controllers\PostController::class . '->index');
    $router->get('/create', \app\controllers\PostController::class . '->create');
    $router->post('', \app\controllers\PostController::class . '->store');
    $router->get('/@id', \app\controllers\PostController::class . '->show');
    $router->get('/@id/edit', \app\controllers\PostController::class . '->edit');
    $router->post('/@id/edit', \app\controllers\PostController::class . '->update');
    $router->get('/@id/delete', \app\controllers\PostController::class . '->destroy');
});
So you'll notice we use a group() method here to group all the routes together that start with /blog. We could actually rewrite the routes like the following with the group() method and the same thing would happen:
// Posts
$router->get('/blog', \app\controllers\PostController::class . '->index');
$router->get('/blog/create', \app\controllers\PostController::class . '->create');
With the controller, first let's create an empty controller with runway:
php runway make:controller Post
You can copy the code below for your PostController.php:
app = $app;
    }

    /**
     * Index
     *
     * @return void
     */
    public function index(): void
    {
        $PostRecord = new PostRecord($this->app->db());
        $posts = $PostRecord->order('id DESC')->findAll();
        $CommentRecord = new CommentRecord($this->app->db());
        foreach($posts as &$post) {
            $post->comments = $CommentRecord->eq('post_id', $post->id)->findAll();
        }
        $this->app->render('posts/index.latte', [ 'page_title' => 'Blog', 'posts' => $posts]);
    }

    /**
     * Create
     *
     * @return void
     */
    public function create(): void
    {
        $this->app->render('posts/create.latte', [ 'page_title' => 'Create Post']);
    }

    /**
     * Store
     *
     * @return void
     */
    public function store(): void
    {
        $postData = $this->app->request()->data;
        $PostRecord = new PostRecord($this->app->db());
        $PostRecord->title = $postData->title;
        $PostRecord->content = $postData->content;
        $PostRecord->username = $postData->username;
        $PostRecord->created_at = gmdate('Y-m-d H:i:s');
        $PostRecord->updated_at = null;
        $PostRecord->save();
        $this->app->redirect('/blog');
    }

    /**
     * Show
     *
     * @param int $id The ID of the post
     * @return void
     */
    public function show(int $id): void
    {
        $PostRecord = new PostRecord($this->app->db());
        $post = $PostRecord->find($id);
        $CommentRecord = new CommentRecord($this->app->db());
        $post->comments = $CommentRecord->eq('post_id', $post->id)->findAll();
        $this->app->render('posts/show.latte', [ 'page_title' => $post->title, 'post' => $post]);
    }

    /**
     * Edit
     *
     * @param int $id The ID of the post
     * @return void
     */
    public function edit(int $id): void
    {
        $PostRecord = new PostRecord($this->app->db());
        $post = $PostRecord->find($id);
        $this->app->render('posts/edit.latte', [ 'page_title' => 'Update Post', 'post' => $post]);
    }

    /**
     * Update
     *
     * @param int $id The ID of the post
     * @return void
     */
    public function update(int $id): void
    {
        $postData = $this->app->request()->data;
        $PostRecord = new PostRecord($this->app->db());
        $PostRecord->find($id);
        $PostRecord->title = $postData->title;
        $PostRecord->content = $postData->content;
        $PostRecord->username = $postData->username;
        $PostRecord->updated_at = gmdate('Y-m-d H:i:s');
        $PostRecord->save();
        $this->app->redirect('/blog');
    }

    /**
     * Destroy
     *
     * @param int $id The ID of the post
     * @return void
     */
    public function destroy(int $id): void
    {
        $PostRecord = new PostRecord($this->app->db());
        $post = $PostRecord->find($id);
        $post->delete();
        $this->app->redirect('/blog');
    }
}
Let's kill some time and talk about a few things that are going on in the controller.
First off we are now using our new active record classes:
$PostRecord = new PostRecord($this->app->db());
$posts = $PostRecord->order('id DESC')->findAll();
We are injecting the database we setup in the services.php file above with $this->app->db();. Technically we could also just use Flight::db() as this points to the global $app variable.
Active Record classes are really helpful to simplify interactions with a database. We could rewrite the above in the following code:
$posts = $this->app->db()->fetchAll("SELECT * FROM posts ORDER BY id DESC");
This might not be the best example of how helpful an active record could be. But in part 2 I'll show you some hidden gems inside these classes that make it so much better than writing raw SQL.
Now let's talk HTML files. Here are the files we'll need for the post routes:
app/views/posts/index.latte
{extends '../layout.latte'}
{block content}
My Amazing Blog
Welcome to my blog!
{foreach $posts as $post}
{first}
Recent Posts
{/first}
{$post->title}
By: {$post->username} on {$post->created_at|date:'d.m.Y G:i a'}
Comments: {count($post->comments)}
{$post->content|truncate:100}
Update - Delete
{/foreach}
{/block}
app/views/posts/show.latte
{extends '../layout.latte'}

{block content}
< Back to blog
{$post->title}
Created by: {$post->username} on {$post->created_at|date:'d.m.Y G:i a'}.

    {$post->content|breakLines}

Last update: {$post->update_at|date:'d.m.Y G:i a'}.

Comments
{foreach $post->comments as $comment}

    {$comment->username} on {$comment->created_at|date:'d.m.Y G:i a'}.

        {$comment->content|breakLines}


    Delete

{else}
No comments yet.
{/foreach}

Add comment
{/block}
app/views/posts/create.latte
{extends '../layout.latte'}

{block content}
Create a Post
{/block}
app/views/posts/edit.latte
{extends '../layout.latte'}

{block content}
Update a Post
{/block}
Create a new post
Now that we've got all the pieces in place, you should be able to load up your blog page, create a new post, see a post, and delete a post. You may have noticed we've included a comment form but the form doesn't actually work. We can fix that real quick! Let's create a controller with runway:
php runway make:controller Comment
Now you can make the CommentController.php look like the following:
app = $app;
    }

    /**
     * Store
     *
     * @param int $id The post ID
     *
     * @return void
     */
    public function store(int $id): void
    {
        $postData = $this->app->request()->data;
        $CommentRecord = new CommentRecord($this->app->db());
        $CommentRecord->post_id = $id;
        $CommentRecord->username = $postData->username;
        $CommentRecord->content = $postData->content;
        $CommentRecord->created_at = gmdate('Y-m-d H:i:s');
        $CommentRecord->updated_at = null;
        $CommentRecord->save();
        $this->app->redirect('/blog/' . $id);
    }

    /**
     * Destroy
     *
     * @param int $id The post ID
     * @param int $comment_id The comment ID
     *
     * @return void
     */
    public function destroy(int $id, int $comment_id): void
    {
        $CommentRecord = new CommentRecord($this->app->db());
        $CommentRecord->find($comment_id);
        $CommentRecord->delete();
        $this->app->redirect('/blog/' . $id);
    }

}
Now let's add a couple other routes in the group chunk of code in routes.php
// Blog
$router->group('/blog', function(Router $router) {

    // Posts

    // post routes...

    // Comments
    $router->post('/@id/comment', \app\controllers\CommentController::class . '->store');
    $router->get('/@id/comment/@comment_id/delete', \app\controllers\CommentController::class . '->destroy');
});
Conclusion (sort of)
With these two additions to the code, you have a fully functioning blog built with Flight! This got the job done and you now have a blog, but the code is somewhat clunky and could be improved to have some pretty nifty features like middleware, permissions, and writing less code! Hop over to part 2
Go ahead and leave any questions in comments below or join us in the chatroom!
If you want to see the final product with all the improvements here's the code!
-
 編譯器報錯“usr/bin/ld: cannot find -l”解決方法錯誤:“ usr/bin/ld:找不到-l “ 此錯誤表明鏈接器在鏈接您的可執行文件時無法找到指定的庫。為了解決此問題,我們將深入研究如何指定庫路徑並將鏈接引導到正確位置的詳細信息。 添加庫搜索路徑的一個可能的原因是,此錯誤是您的makefile中缺少庫搜索路徑。要解決它,您可以在鏈接器命令中添...程式設計 發佈於2025-07-03
 -
如何將PANDAS DataFrame列轉換為DateTime格式並按日期過濾?將pandas dataframe列轉換為dateTime格式示例:使用column(mycol)包含以下格式的以下dataframe,以自定義格式:})指定的格式參數匹配給定的字符串格式。轉換後,MyCol列現在將包含DateTime對象。 date oped filtering > = ...程式設計 發佈於2025-07-03
-
Java的Map.Entry和SimpleEntry如何簡化鍵值對管理?A Comprehensive Collection for Value Pairs: Introducing Java's Map.Entry and SimpleEntryIn Java, when defining a collection where each element com...程式設計 發佈於2025-07-03
-
如何將來自三個MySQL表的數據組合到新表中?mysql:從三個表和列的新表創建新表 答案:為了實現這一目標,您可以利用一個3-way Join。 選擇p。 *,d.content作為年齡 來自人為p的人 加入d.person_id = p.id上的d的詳細信息 加入T.Id = d.detail_id的分類法 其中t.taxonomy ...程式設計 發佈於2025-07-03
-
如何使用Python有效地以相反順序讀取大型文件?在python 中,如果您使用一個大文件,並且需要從最後一行讀取其內容,則在第一行到第一行,Python的內置功能可能不合適。這是解決此任務的有效解決方案:反向行讀取器生成器 == ord('\ n'): 緩衝區=緩衝區[:-1] ...程式設計 發佈於2025-07-03
-
如何為PostgreSQL中的每個唯一標識符有效地檢索最後一行?postgresql:為每個唯一標識符在postgresql中提取最後一行,您可能需要遇到與數據集合中每個不同標識的信息相關的信息。考慮以下數據:[ 1 2014-02-01 kjkj 在數據集中的每個唯一ID中檢索最後一行的信息,您可以在操作員上使用Postgres的有效效率: id dat...程式設計 發佈於2025-07-03
-
為什麼PYTZ最初顯示出意外的時區偏移?與pytz 最初從pytz獲得特定的偏移。例如,亞洲/hong_kong最初顯示一個七個小時37分鐘的偏移: 差異源利用本地化將時區分配給日期,使用了適當的時區名稱和偏移量。但是,直接使用DateTime構造器分配時區不允許進行正確的調整。 example pytz.timezone(&#...程式設計 發佈於2025-07-03
-
如何限制動態大小的父元素中元素的滾動範圍?在交互式接口中實現垂直滾動元素的CSS高度限制問題:考慮一個佈局,其中我們具有與用戶垂直滾動一起移動的可滾動地圖div,同時與固定的固定sidebar保持一致。但是,地圖的滾動無限期擴展,超過了視口的高度,阻止用戶訪問頁面頁腳。 $("#map").css({ margin...程式設計 發佈於2025-07-03
-
CSS可以根據任何屬性值來定位HTML元素嗎?靶向html元素,在CSS 中使用任何屬性值,在CSS中,可以基於特定屬性(如下所示)基於特定屬性的基於特定屬性的emants目標元素: 字體家庭:康斯拉斯(Consolas); } 但是,出現一個常見的問題:元素可以根據任何屬性值而定位嗎?本文探討了此主題。 的目標元素有任何任何屬性值,...程式設計 發佈於2025-07-03
-
如何同步迭代並從PHP中的兩個等級陣列打印值?同步的迭代和打印值來自相同大小的兩個數組使用兩個數組相等大小的selectbox時,一個包含country代碼的數組,另一個包含鄉村代碼,另一個包含其相應名稱的數組,可能會因不當提供了exply for for for the uncore for the forsion for for ytry...程式設計 發佈於2025-07-03
-
如何解決AppEngine中“無法猜測文件類型,使用application/octet-stream...”錯誤?appEngine靜態文件mime type override ,靜態文件處理程序有時可以覆蓋正確的mime類型,在錯誤消息中導致錯誤消息:“無法猜測mimeType for for file for file for [File]。 application/application/octet...程式設計 發佈於2025-07-03
-
我可以將加密從McRypt遷移到OpenSSL,並使用OpenSSL遷移MCRYPT加密數據?將我的加密庫從mcrypt升級到openssl 問題:是否可以將我的加密庫從McRypt升級到OpenSSL?如果是這樣,如何? 答案:是的,可以將您的Encryption庫從McRypt升級到OpenSSL。 可以使用openssl。 附加說明: [openssl_decrypt()函數要求...程式設計 發佈於2025-07-03
-
您如何在Laravel Blade模板中定義變量?在Laravel Blade模板中使用Elegance 在blade模板中如何分配變量對於存儲以後使用的數據至關重要。在使用“ {{}}”分配變量的同時,它可能並不總是最優雅的解決方案。 幸運的是,Blade通過@php Directive提供了更優雅的方法: $ old_section =...程式設計 發佈於2025-07-03
-
解決Spring Security 4.1及以上版本CORS問題指南彈簧安全性cors filter:故障排除常見問題 在將Spring Security集成到現有項目中時,您可能會遇到與CORS相關的錯誤,如果像“訪問Control-allo-allow-Origin”之類的標頭,則無法設置在響應中。為了解決此問題,您可以實現自定義過濾器,例如代碼段中的MyFi...程式設計 發佈於2025-07-03
-
C++20 Consteval函數中模板參數能否依賴於函數參數?[ consteval函數和模板參數依賴於函數參數在C 17中,模板參數不能依賴一個函數參數,因為編譯器仍然需要對非contexexpr futcoriations contim at contexpr function進行評估。 compile time。 C 20引入恆定函數,必須在編譯時進...程式設計 發佈於2025-07-03


學習中文
- 1 走路用中文怎麼說? 走路中文發音,走路中文學習
- 2 坐飛機用中文怎麼說? 坐飞机中文發音,坐飞机中文學習
- 3 坐火車用中文怎麼說? 坐火车中文發音,坐火车中文學習
- 4 坐車用中文怎麼說? 坐车中文發音,坐车中文學習
- 5 開車用中文怎麼說? 开车中文發音,开车中文學習
- 6 游泳用中文怎麼說? 游泳中文發音,游泳中文學習
- 7 騎自行車用中文怎麼說? 骑自行车中文發音,骑自行车中文學習
- 8 你好用中文怎麼說? 你好中文發音,你好中文學習
- 9 謝謝用中文怎麼說? 谢谢中文發音,谢谢中文學習
- 10 How to say goodbye in Chinese? 再见Chinese pronunciation, 再见Chinese learning


