
使用 Web 工具進行 Android 開發:使用 Ionic React 進行生產的最快方式
 瀏覽:596
Investing in Android development can yield a huge device market share, expanded market reach, and high return on investment.
With over 6.8 billion smartphone users worldwide. Android holds approximately 70% of the global market share, translating to about 4.76 billion users, finding your niche is within reach. It's all about producing high-quality, fast applications.
Ionic, with native web components, enables you to achieve performant and high-quality Android apps using familiar tools like HTML, JavaScript, and CSS, while tapping into native functionalities with Capacitor.
This is more than just a tutorial on Ionic; it's about building quality and performant Android applications ready for production.
This article is an introduction to a series where we'll cover the basics of Ionic with React as our frontend and later explore the bridge between native and web technologies using Capacitor.
Ionic framework: An Introduction
Runtimes or bridges between different technologies are nothing new!
Take Node.js, for example. Only through Node can JavaScript become a systems language.
   [JS]
   [byte code]
   [Node] --> [N API] --> [C/C   modules]
   [bindings]
   [Cpp][V8][libuv]
   [OS]
Consider hybrid desktop applications using HTML, JavaScript, and CSS as a view via the webview. Go Wails, a very performant desktop development framework, is based on this idea. Similarly, Rust Tauri apps operate on this principle.
Bindings have existed and been tested for a while in the mobile world, with examples like React Native and NativeScript.
The development world is realizing the importance of not just UI but beautiful and responsive UI. There are no frameworks as advanced as web technologies in this field.
Android native development is shifting towards the direction of React with composable UIs in Kotlin, moving away from the less favored XML.
This trend brings the best of both worlds: native speed with beautiful composable UI. That's where Ionic stands out among its peers. The difference is that Ionic is easy to grasp—I successfully built a client's application in under a month.
Setup
Create a new project folder and run the following:
npx ionic start
This will take you through the Ionic setup. Choose React as the frontend framework for this article.
Ionic still uses Webpack and Create React App (CRA) because Vite does not yet support Stencil.js, the core of Ionic web components.
Once everything is installed, open the project in VSCode. I prefer to remove npm and use pnpm (this step is optional). If you want to do the same:
Delete the node_modules folder.
Delete the package-lock.json file, not package.json.
Run pnpm install.
To run an Ionic application, use:
npx ionic serve
The Ionic CLI will take care of everything. You can also use the --lab option for a phone-like preview (note, this is not an Android or iOS emulator, but a "view"):
pnpm add -D @ionic/lab

npx ionic serve --lab
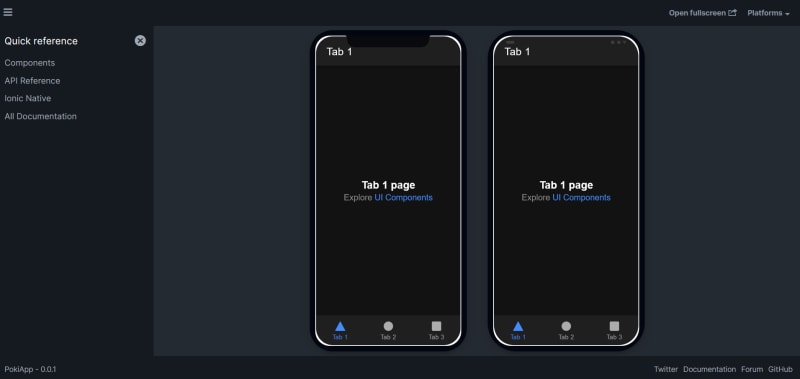
This allows us to preview how the UI will look on a phone-like view.
Going Over the structure
I assume you have the project open in an IDE of your choice. If you do not have React experience, this may be a bit challenging. I suggest taking a basic React tutorial and learning about React routers.
The entry point is a standard React application render in index.tsx:
root.render();
In App.tsx, it's a router and tab navigation bar, using Ionic router and components. Ionic components are native web components built with Stencil.js, designed to look like a mobile application.
Ionic provides CSS files and themes to match the standards of both iOS and Android. Use Ionic components over HTML for a natural mobile application look and feel.
Let's break down App.tsx, starting with the router. It works similarly to the React web router, matching a path to a component and rendering the matching component on navigation.
import Tab1 from './pages/Tab1';

import Tab2 from './pages/Tab2';

import Tab3 from './pages/Tab3';
If you're familiar with backend, the path is like an endpoint, and the component is a handler.
            Tab 1


            Tab 2


            Tab 3
The IonTabBar creates a tab bar at the provided slot, in our application its bottom. The magic is in the tab button: triggers the router using hrefs. All normal React code, wrapped in Ionic components.
Follow one of the tab pages; they are essentially just pages.
          Tab 1


            Tab 1
Using the Ionic page component handles things like scrolling and responsiveness out of the box.
The standard structure of an Ionic page includes a header with a toolbar and a content area, similar to most mobile applications.
Header:
Tab 1
Content area:
Tab 1
The content area occupies most of the screen, where most of the application lives. The ExploreContainer acts as a slot; we can conditionally render components based on the name prop.
When name is "Tab 1," we render a component for that tab. You can hard code components for each tab, but the slot method is more flexible and composable.
For example, open the ExploreContainer component under the components folder and create three new components:
const Tab1Content = () => { return ( "I am tab 1 content" ); }

const Tab2Content = () => { return ( "I am tab 2 content" ); }

const Tab3Content = () => { return ( "I am tab 3 content" ); }
Now update the container to conditionally render based on the name prop:
{name.includes("Tab 1") ?: name.includes("Tab 2") ? : }
This is just an example; you can create an easy-to-follow pattern matching method. The updated preview should show "I am tab x content" based on the tab clicked.
This application is still web-based. We haven't installed or initialized Capacitor, which is responsible for turning our application into a native app.
Capacitor is a cross-platform native runtime for web apps, allowing us to create cross-platform iOS, Android, and Progressive Web Apps with JavaScript, HTML, and CSS.
Enabling Capacitor in Ionic
First, install Capacitor:
pnpm add @capacitor/core
pnpm add -D @capacitor/cli
Next, initialize the Capacitor configuration file:
npx cap init
The package ID should uniquely identify your app. We use an inverted domain name, e.g., com.example.app.
Capacitor is initialized. Run the following commands to install a Capacitor platform and primitive plugins:
pnpm add @capacitor/android


pnpm add @capacitor/app @capacitor/haptics @capacitor/keyboard @capacitor/status-bar
The following command will create the native android project structure and files in your ionic project:
npx cap add android
Important: Build the web app:
pnpm run build
to avoid this error before we run sync
[error] Could not find the web assets directory: .\build.

... More info: https://capacitorjs.com/docs/basics/workflow#sync-your-project
Once the build is finished, you can sync, copying the built web app; into the native webview:
npx cap sync
Believe it or not, we are ready to either build or preview the native application in an emulator.
We'll dive deeper into Capacitor and native development, environment setup, etc., in the next article.
Since we are still getting a feel for Ionic, let's play with a few Ionic components and wrap up with a simple application example.
PokeApp Example
You can easily find Ionic components in the documentation.
We'll implement a simple app that fetches Pokémon data from the PokeAPI, for a compact card view, and then build it into an APK.

From the results, we can already see how decent the app looks with no styling—thanks to the power of Ionic components.
Open the ExploreContainer component, and we'll work on Tab 2.
Update the component and add the following:
const BASE_LINK = "https://pokeapi.co/api/v2/pokemon/"


const Tab2Content = () => {


 const [pokemon, setPokemon] = useState("pikachu")


 useEffect(()=> {

if(pokemon != ""){

  fetch(BASE_LINK   pokemon).then(async(poke)=> {

       console.log(await poke.json())

    }).catch((err)=>console.log(err))

 }


 }, [pokemon])


// add some padding to the div below

return  (


        I am tab 2 content


)}
We've added a state to track the Pokémon we want to look up, with the default being Pikachu:
const [pokemon, setPokemon] = useState("pikachu")
On load, we fetch the Pokémon data from the PokeAPI:
 useEffect(()=> {

if(pokemon != ""){

  fetch(BASE_LINK   pokemon).then(async(poke)=> {

       console.log(await poke.json())

    }).catch((err)=>console.log(err))    }

 }, [pokemon])
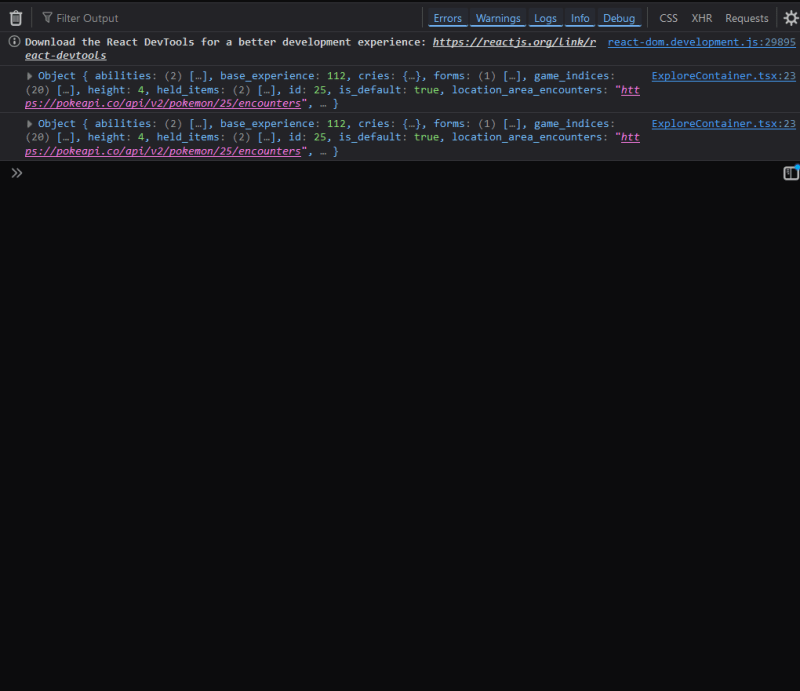
The useEffect hook runs twice in React strict mode.
Instead of logging our result, let's turn it into a state so we can use it in our card component.
First, add a new useState under the Pokémon one:
const [showResults, setResults] = useState()
Then, update the useEffect to set the results::
 useEffect(()=> {
    if(pokemon != ""){
      fetch(BASE_LINK   pokemon).then(async(poke)=> {


       const results = await poke.json()
       const {front_default} = results.sprites
       setResults({front_default})


      }).catch((err)=> console.log(err))
    }
  }, [pokemon])
The PokeAPI returns a lot of data. We are interested in the Pokémon image, specifically the front-facing image in the sprites object:
       const results = await poke.json()
       const {front_default} = results.sprites
       setResults({front_default})
If you are familiar with React, you know we have created the re-render on state change loop already. Now, we just need to consume the data:
return (){pokemon} 
We use an Ion card component to show the retrieved image:
We have a basic structure already, but we can only show the default Pokémon. We need a way to accept user input (a Pokémon name) and make a fetch request based on that input.
The basic React approach is to have an input element bound to a useState value, updating it on onChange. However, in our case, this is problematic because every keystroke will trigger our useEffect, making multiple erroneous requests to the PokeAPI.
Instead, we need the user to type fully and press a search button to initiate the API call. Copy the code below and paste it on top of the Ion card:
PokeSearch() }>search
From the code above, we need two things: a useRef pointing to our Ion input and a PokeSearch function triggered by an Ion button.
const Tab2Content = () => {
  const [pokemon, setPokemon] = useState("pikachu")
  const [showResults, setResults] = useState()
  const pokeNameref = useRef(null)

  const PokeSearch = () => {

    if(pokeNameref.current){

      console.log(pokeNameref.current.value)
         setPokemon(pokeNameref.current.value.toLocaleLowerCase())
    }
  }


....


}
The code below is responsible for updating the state, triggering the effect
 if(pokeNameref.current){

      console.log(pokeNameref.current.value)
         setPokemon(pokeNameref.current.value.toLocaleLowerCase())
    }
The entire component:
const Tab2Content = () => {
  const [pokemon, setPokemon] = useState("pikachu")
  const [showResults, setResults] = useState()
  const pokeNameref = useRef(null)

  const PokeSearch = () => {

    if(pokeNameref.current){

      console.log(pokeNameref.current.value)
      setPokemon(pokeNameref.current.value.toLocaleLowerCase())
    }
  }

  useEffect(()=> {
    if(pokemon != ""){
      fetch(BASE_LINK   pokemon).then(async(poke)=> {
       const results = await poke.json()
       console.log(results.sprites)
       const {front_default} = results.sprites
       setResults({front_default})
      }).catch((err)=> console.log(err))
    }
  }, [pokemon])

  return  (


       PokeSearch() }>search


        {pokemon}


  )
}
Our simple PokeApp is complete. Make sure ionic serve --lab is running and type a few Pokémon names, such as:
bulbasaur dragonite
If everything is set up correctly, the Pokémon should change on search.
Not a life-changing application, but enough for learning Ionic. The next step requires Android Studio . Download it and follow the defaults while installing it.
PokeApp to APK
If you have never seen Android Studio, it’s probably the most complex IDE and has a steep learning curve!
I suggest following the defaults on installation and letting it run its course. My only suggestion is to select the option to install an emulator, which makes it easier to build and review the APK before bundling it.
When you download Android Studio for the first time, it'll download a lot of dependencies and set up Gradle, which may take some time. Let it do its thing. Gradle is a build tool for Android, similar to how we use Webpack or Vite in web development.
When you are ready and Android Studio is installed, navigate to our PokeApp in the terminal.
As an extra precaution, build and sync before opening the project in Android Studio to ensure there are no errors:
pnpm run build

npx cap sync
If the build is successful, we can rest assured there are no errors in our application. Next, open the project in Android Studio:
npx cap open android
Let the Gradle processes run:

When Gradle is done, try running the app in an emulator (top middle) in the IDE. If the app runs on the emulator, you can be sure it'll bundle to a standalone APK:

Check this extensive link for more ways to debug and run your APK: android studio run
Notes on Building the APK
There are a few steps involved in building an actual production APK for the Google Play Store, from setting up an Android console to creating banner images, which are tedious but essential tasks.
Note: The Android development account is a one-time fee. You can buy and set it up on Google Console.
Design, search keywords, and banners are beyond coding. This series is about getting the coding part right! I promise everything else will fall into place with practice and getting used to the tediousness of the Google Play Console.
In short, I will skip the Google Play Console for a few reasons:
It takes a while (2 weeks minimum) to get approved.
When approved, the APK goes through a vetting process (takes time, may fail).You can't submit an APK on Google Console unless you have banners and icons.
There is a lot of editing and icon generation for different screens.
These reasons make it impractical to include in a tutorial. But rest assured, what I will show you in this and upcoming articles will prepare you to build production-ready applications to publish in any store besides Google or for self-hosting.
However, if you already have a Google Play account, there are many articles and videos on publishing an Ionic Android app.
For our case, as long as we can generate a debug APK file and install it on an emulator or real phone, the other steps are just a Google search away!
Because this process is tedious, I will dedicate a separate article in this series to go through Android Studio, sign an APK, and build a release. For now, a debug APK will suffice as this article is already long.
Generating a debug apk
Look at your Android Studio top bar left; after the Android icon, there should be a hamburger menu button. Select to expand the menu. The build option is hidden there:
If the APK is generated successfully, a popup should show at the bottom right with a locate option, which will open the explorer to the APK path. You can share or install it on an Android device!
If you want to create a signed APK, the full production deal, Google has an extensive documentation
This was a high-level overview. We will go deeper with each article in the series.
In this article, we introduced Android development using web tools, and our framework of choice was Ionic. We covered the basics of Ionic and Ionic components, how to set up the native runtime bridge Capacitor, and built a debug APK.
If you are ready to dive deep into Capacitor, you can find the next article here: Capacitor JS: The Bridge Between Web Tech & Native—Android, IOS, PWA
This is just the start.
If you are interested in more longer, exclusive, practical content, I have tiers and posts designed to elevate your programming skills at the ko-fi platform.
-
 查找當前執行JavaScript的腳本元素方法如何引用當前執行腳本的腳本元素在某些方案中理解問題在某些方案中,開發人員可能需要將其他腳本動態加載其他腳本。但是,如果Head Element尚未完全渲染,則使用document.getElementsbytagname('head')[0] .appendChild(v)的常規方...程式設計 發佈於2025-07-16
 -
Go語言垃圾回收如何處理切片內存?Garbage Collection in Go Slices: A Detailed AnalysisIn Go, a slice is a dynamic array that references an underlying array.使用切片時,了解垃圾收集行為至關重要,以避免潛在的內存洩...程式設計 發佈於2025-07-16
-
CSS強類型語言解析您可以通过其强度或弱输入的方式对编程语言进行分类的方式之一。在这里,“键入”意味着是否在编译时已知变量。一个例子是一个场景,将整数(1)添加到包含整数(“ 1”)的字符串: result = 1 "1";包含整数的字符串可能是由带有许多运动部件的复杂逻辑套件无意间生成的。它也可以是故意从单个真理...程式設計 發佈於2025-07-16
-
Python讀取CSV文件UnicodeDecodeError終極解決方法在試圖使用已內置的CSV模塊讀取Python中時,CSV文件中的Unicode Decode Decode Decode Decode decode Error讀取,您可能會遇到錯誤的錯誤:無法解碼字節 在位置2-3中:截斷\ uxxxxxxxx逃脫當CSV文件包含特殊字符或Unicode的路徑逃...程式設計 發佈於2025-07-16
-
解決MySQL插入Emoji時出現的\\"字符串值錯誤\\"異常Resolving Incorrect String Value Exception When Inserting EmojiWhen attempting to insert a string containing emoji characters into a MySQL database us...程式設計 發佈於2025-07-16
-
PHP未來:適應與創新PHP的未來將通過適應新技術趨勢和引入創新特性來實現:1)適應云計算、容器化和微服務架構,支持Docker和Kubernetes;2)引入JIT編譯器和枚舉類型,提升性能和數據處理效率;3)持續優化性能和推廣最佳實踐。 引言在編程世界中,PHP一直是網頁開發的中流砥柱。作為一個從1994年就開始發展...程式設計 發佈於2025-07-16
-
如何將PANDAS DataFrame列轉換為DateTime格式並按日期過濾?Transform Pandas DataFrame Column to DateTime FormatScenario:Data within a Pandas DataFrame often exists in various formats, including strings.使用時間數據時...程式設計 發佈於2025-07-16
-
如何使用替換指令在GO MOD中解析模塊路徑差異?在使用GO MOD時,在GO MOD 中克服模塊路徑差異時,可能會遇到衝突,其中可能會遇到一個衝突,其中3派對軟件包將另一個帶有導入套件的path package the Imptioned package the Imptioned package the Imported tocted pac...程式設計 發佈於2025-07-16
-
如何使用node-mysql在單個查詢中執行多個SQL語句?Multi-Statement Query Support in Node-MySQLIn Node.js, the question arises when executing multiple SQL statements in a single query using the node-mys...程式設計 發佈於2025-07-16
-
Java數組中元素位置查找技巧在Java數組中檢索元素的位置 利用Java的反射API將數組轉換為列表中,允許您使用indexof方法。 (primitives)(鏈接到Mishax的解決方案) 用於排序陣列的數組此方法此方法返回元素的索引,如果發現了元素的索引,或一個負值,指示應放置元素的插入點。程式設計 發佈於2025-07-16
-
Java中假喚醒真的會發生嗎?在Java中的浪費喚醒:真實性或神話? 在Java同步中偽裝喚醒的概念已經是討論的主題。儘管存在這種行為的潛力,但問題仍然存在:它們實際上是在實踐中發生的嗎? Linux的喚醒機制根據Wikipedia關於偽造喚醒的文章,linux實現了pthread_cond_wait()功能的Linux實現,...程式設計 發佈於2025-07-16
-
為什麼PHP的DateTime :: Modify('+1個月')會產生意外的結果?使用php dateTime修改月份:發現預期的行為在使用PHP的DateTime類時,添加或減去幾個月可能並不總是會產生預期的結果。正如文檔所警告的那樣,“當心”這些操作的“不像看起來那樣直觀。 考慮文檔中給出的示例:這是內部發生的事情: 現在在3月3日添加另一個月,因為2月在2001年只有2...程式設計 發佈於2025-07-16
-
為什麼我會收到MySQL錯誤#1089:錯誤的前綴密鑰?mySQL錯誤#1089:錯誤的前綴鍵錯誤descript [#1089-不正確的前綴鍵在嘗試在表中創建一個prefix鍵時會出現。前綴鍵旨在索引字符串列的特定前綴長度長度,可以更快地搜索這些前綴。 了解prefix keys `這將在整個Movie_ID列上創建標準主鍵。主密鑰對於唯一識...程式設計 發佈於2025-07-16
-
如何將多種用戶類型(學生,老師和管理員)重定向到Firebase應用中的各自活動?Red: How to Redirect Multiple User Types to Respective ActivitiesUnderstanding the ProblemIn a Firebase-based voting app with three distinct user type...程式設計 發佈於2025-07-16
-
如何使用Python有效地以相反順序讀取大型文件?在python 反向行讀取器生成器 == ord('\ n'): 緩衝區=緩衝區[:-1] 剩餘_size- = buf_size lines = buffer.split('\ n'....程式設計 發佈於2025-07-16


學習中文
- 1 走路用中文怎麼說? 走路中文發音,走路中文學習
- 2 坐飛機用中文怎麼說? 坐飞机中文發音,坐飞机中文學習
- 3 坐火車用中文怎麼說? 坐火车中文發音,坐火车中文學習
- 4 坐車用中文怎麼說? 坐车中文發音,坐车中文學習
- 5 開車用中文怎麼說? 开车中文發音,开车中文學習
- 6 游泳用中文怎麼說? 游泳中文發音,游泳中文學習
- 7 騎自行車用中文怎麼說? 骑自行车中文發音,骑自行车中文學習
- 8 你好用中文怎麼說? 你好中文發音,你好中文學習
- 9 謝謝用中文怎麼說? 谢谢中文發音,谢谢中文學習
- 10 How to say goodbye in Chinese? 再见Chinese pronunciation, 再见Chinese learning


