
Destiny 2 A Rising Chorus Act 3 ウォークスルー: すべての手順、説明
 ブラウズ:642
While the future of Bungie developers might not include Destiny 2 thanks to Sony’s restructuring of certain people, the post-Final Shape story is still trucking along. We will update this week by week to give you the best Destiny 2 A Rising Chorus Act 3 walkthrough, detailing all the steps and side quests you need to complete.
Table of contents
- A Resounding Truth
- Step 1 — Defeat the Conductor’s forces in the Exotic mission Encore
- Steps 2 & 3 — Meet with Ikora in the H.E.L.M, then speak with Failsafe
- Step 4 — Find the stolen Golden Age component on Nessus
- Golden Age Component #1
- Golden Age Component #2
- Golden Age Component #3
- Golden Age Component #4
- Golden Age Component #5
- Steps 5 & 6 — Upgrade Failsafe in the H.E.L.M.
- Step 7 — Help Failsafe research specimen NES007 and discover its secrets
- NES007: Step 1 — Defeat Vex with Solar damage
- NES007: Step 2 — Secure the data Failsafe needs
- NES007: Step 3 — Rapidly defeat Vex to acquire a large sampling of their CPUs
- NES007: Steps 3 & 4 — Speak with Failsafe in the H.E.L.M. to review her report and display the specimen in your collection
- Step 8 — Visit the holoprojector in the H.E.L.M.
- Steps 9 & 10 — Visit the holoprojector in the H.E.L.M. and speak to Saint-14
- Step 11 — Recover the Exo data from the Lost Sector on Europa
- Step 12 — Locate the consciousness driver on Europa
- Step 13 — Destroy the Conductor’s Choral Mind in the Exotic Mission Encore
- Step 14 — Visit the holoprojector in the H.E.L.M.
- Steps 15 & 16 — Visit the holoprojector in the H.E.L.M.
- Step 17 — Search the Neomuna Veil Containment terminals
- Step 18 — Install a network relay for Failsafe to boost her connection
- Step 19 — Stop the Conductors plans by destroying the Choral Mind in Exotic mission Encore
- Step 20 — Confront the Conductor
- Steps 21 & 22 — Speak with Failsafe and Saint-14 in the H.E.L.M.
A Resounding Truth
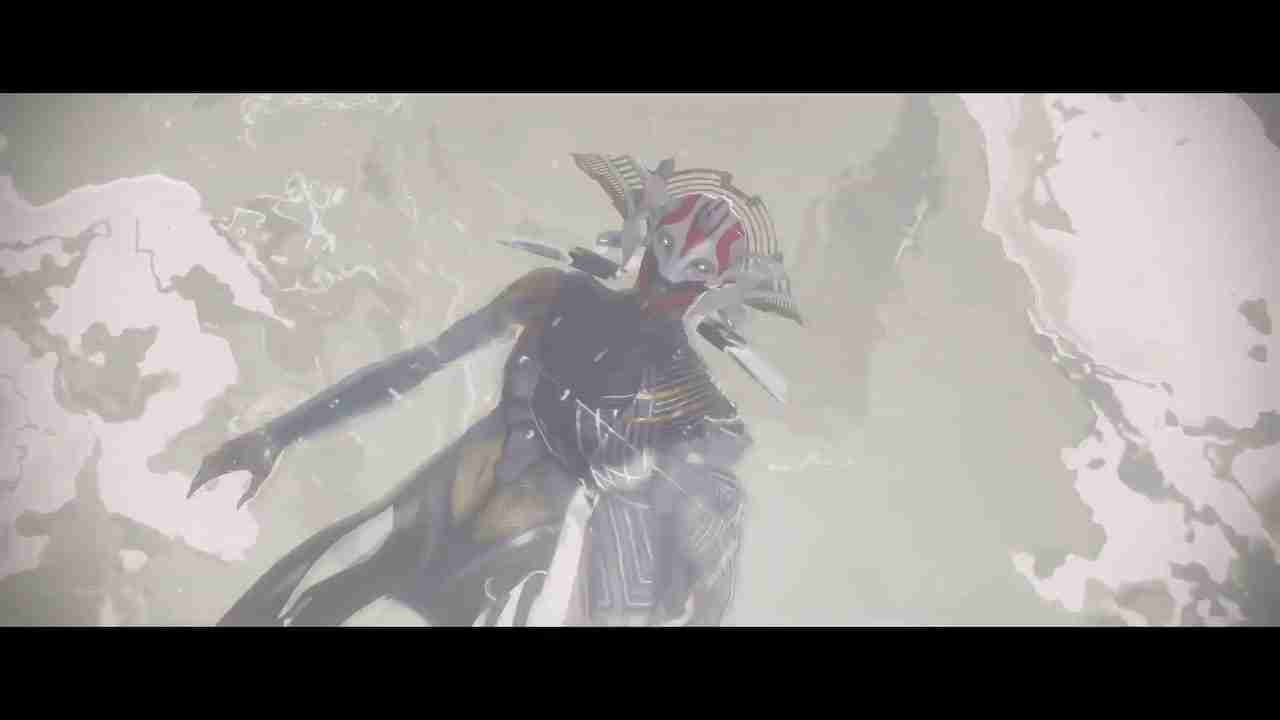
Our first quest line takes us to the everpresent H.E.L.M. location to speak to Failsafe about a new update regarding the big bad of this story, Maya Sundaresh. An interesting cinematic will play, showing the reasoning behind Maya’s sudden transformation.
Once it’s over, speak to Failsafe again and she instructs you to return to the last place you were in Nessus’ core and continue further into the planet. This coincides with the brand-new exotic quest Encore, which just so happens to be our first step in the story quest.
Step 1 — Defeat the Conductor’s forces in the Exotic mission Encore
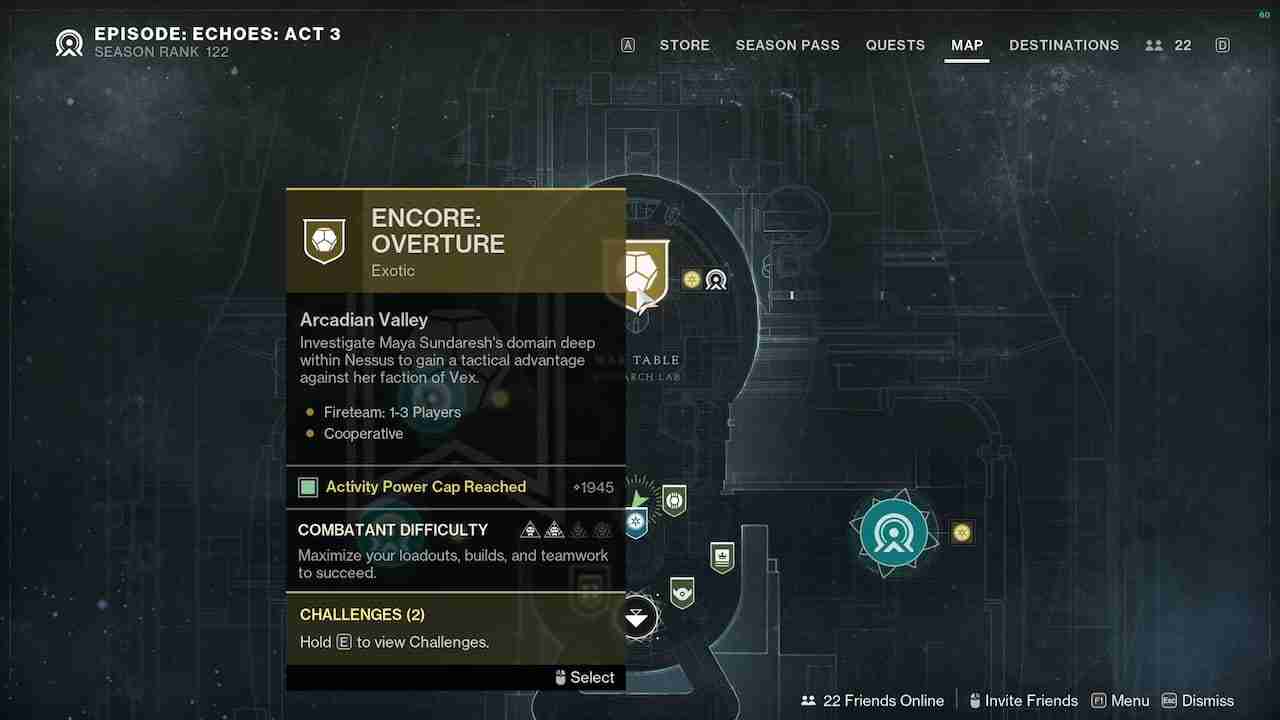
For our first step, you must launch and complete the new Exotic quest Encore from the H.E.L.M. If you need help getting through the fairly long and arduous mission, we’ve got a great Encore Exotic mission guide just for you.
However, it should be mentioned that if you have not completed Act 1 and Act 2 of A Rising Chorus, you will not be able to start the new Exotic quest or receive the weapon if you join a friend who has the mission unlocked.
Once you complete this mission, not only will you get the new Exotic auto-rifle Choir of One, but your next step of the weekly quest will appear.
Steps 2 & 3 — Meet with Ikora in the H.E.L.M, then speak with Failsafe
Upon returning to the H.E.L.M., Ikora speaks to you about the reasoning for all of this, and what Maya truly wants to accomplish. She leaves you with a lot of questions, and a large AI in the middle of the room to talk to.
Interact with Failsafe, and she expresses her excitement in locating the specific coordinates of the Conductor’s base. In order to help Failsafe with this task, you need to bring her a piece of Golden Age tech, and she just so happens to know where you might find it.
Step 4 — Find the stolen Golden Age component on Nessus
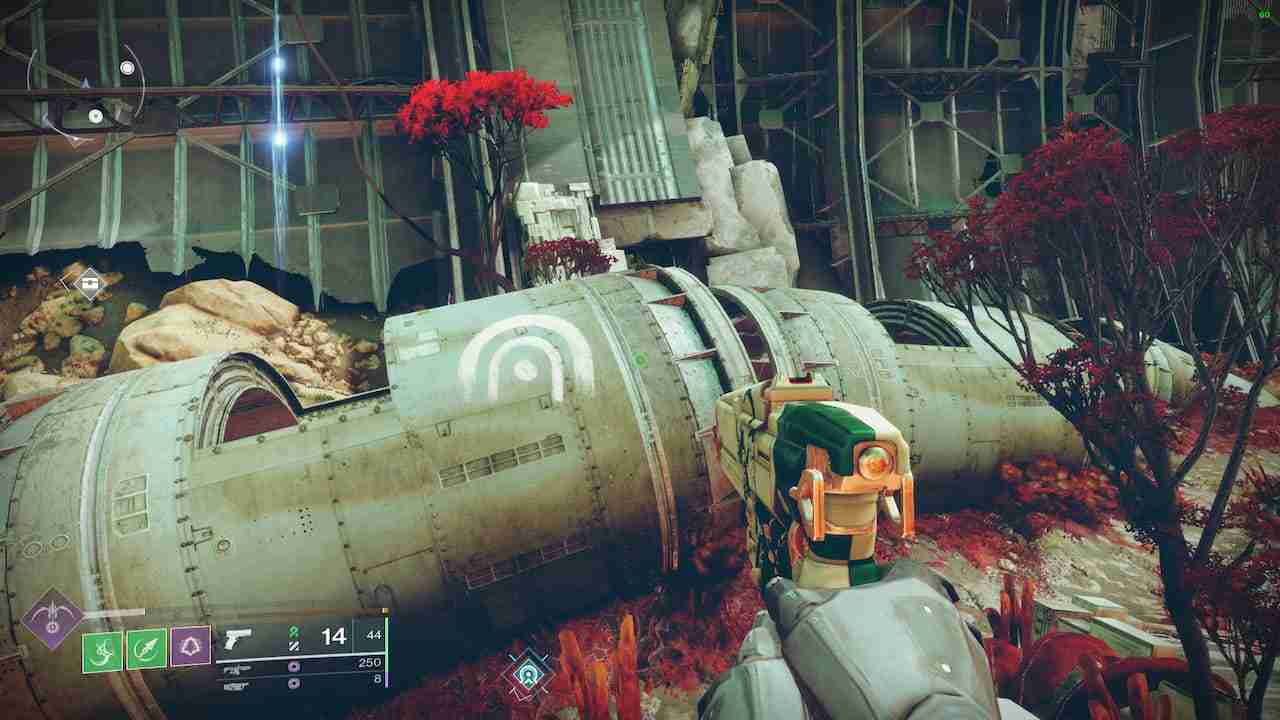
There are a total of 5 Golden Age tech pieces located in The Rift lost sector on Nessus. Teleport to the Exodus Black landing zone on Nessus, and from here, go left towards the wall and you should see the entrance to the lost sector in front of a fuselage on the ground.
Once you get inside, follow the markers until you reach the last area where you’ll find the boss. You can take care of the enemies first, as it will make collecting the tech that much easier.
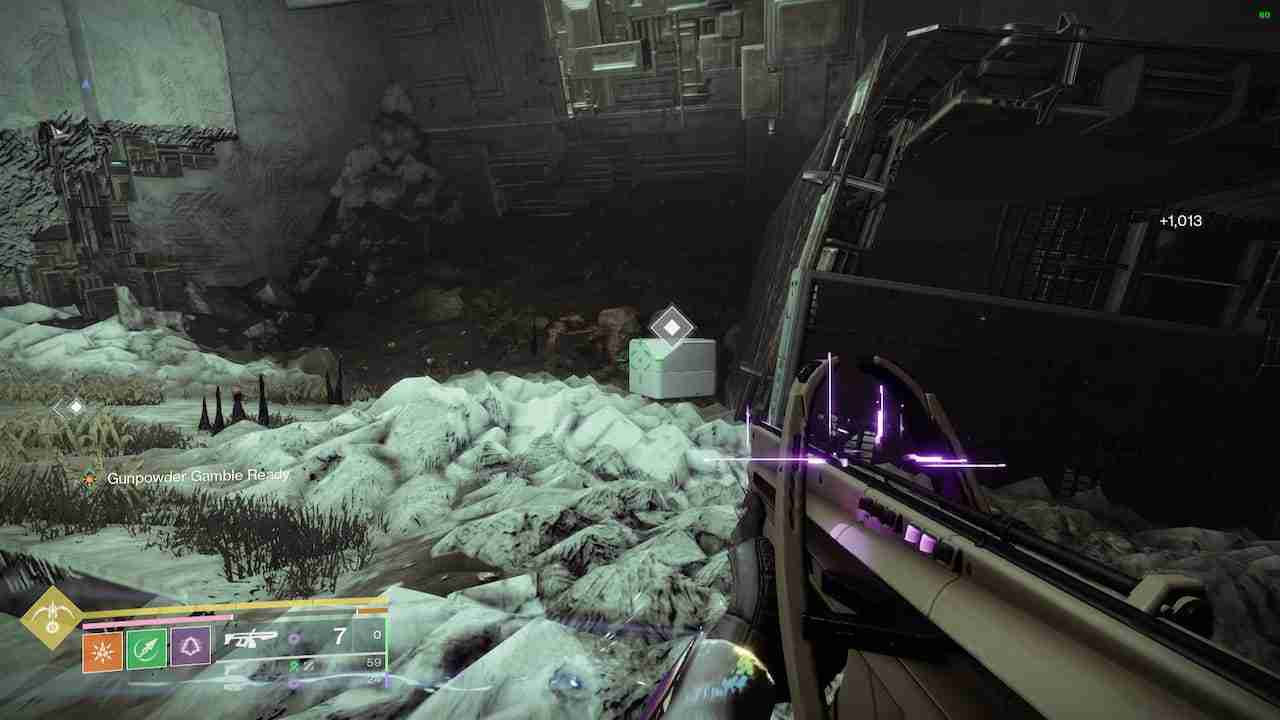
Golden Age Component #1
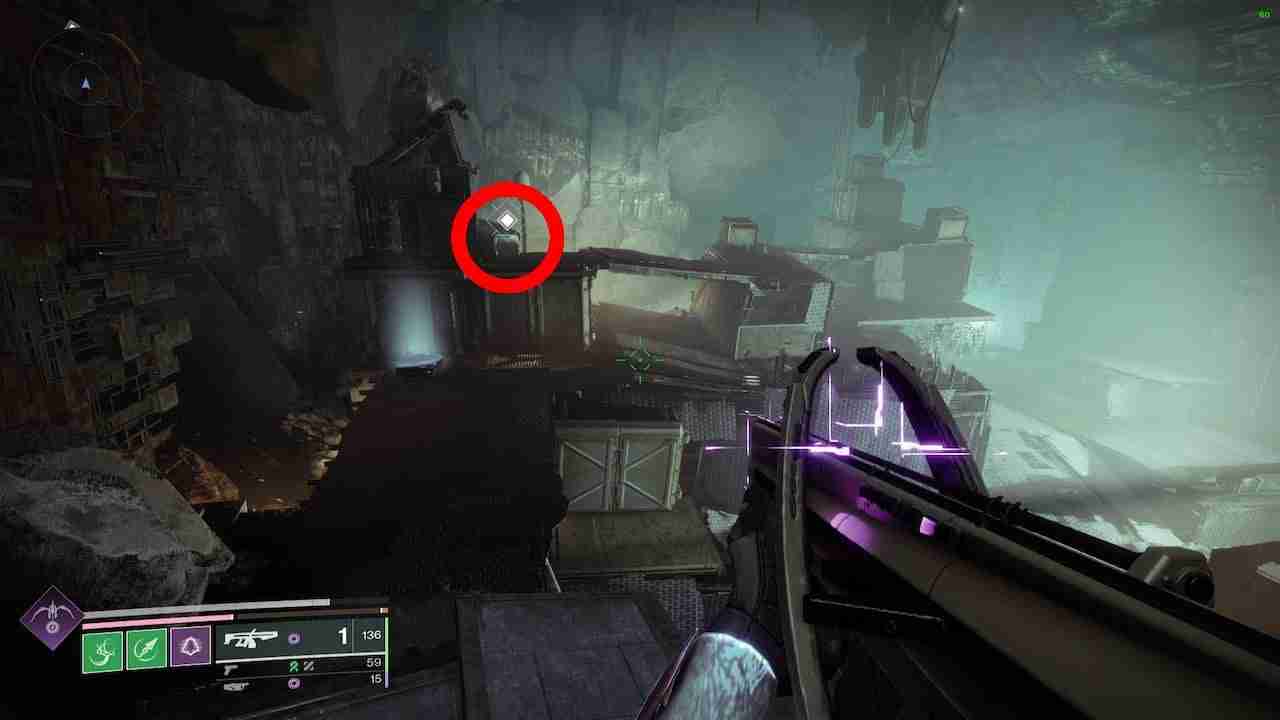
The first chest and by far the easiest one to find, is located above the lost sector chest. Simply jump up to the platform and interact with it to grab your first Golden Age Component.
Golden Age Component #2
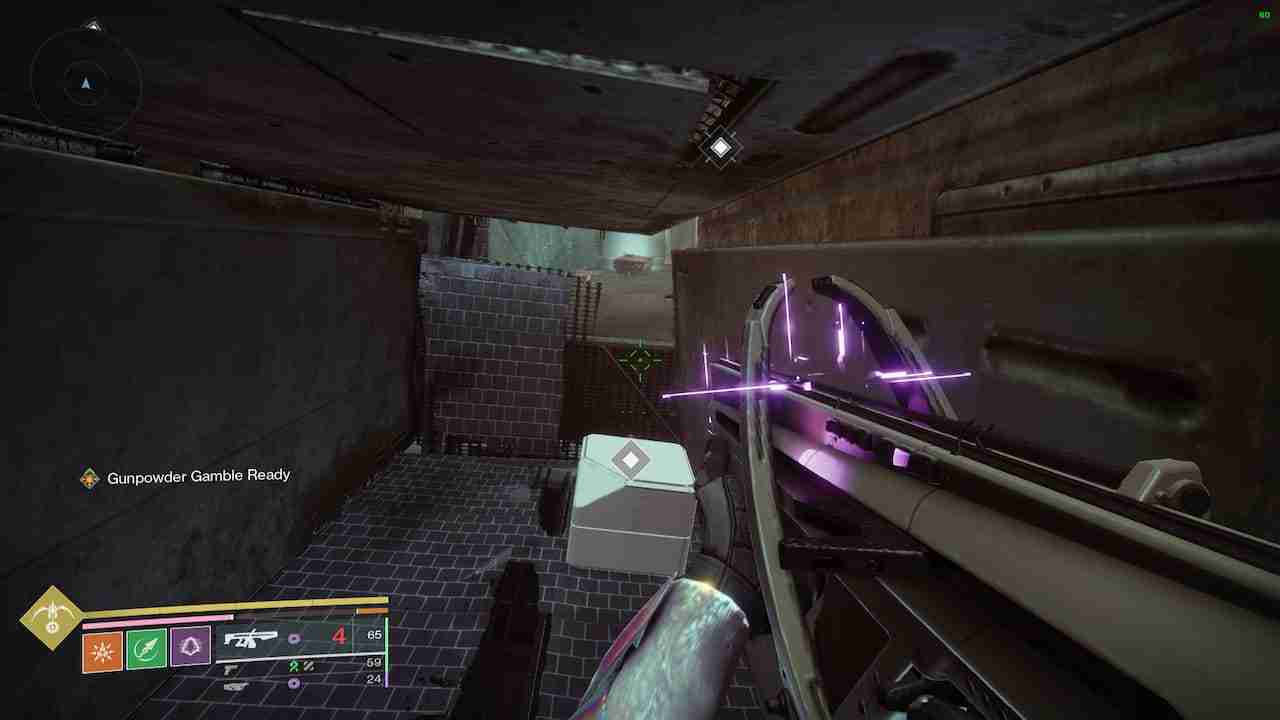
Our second component is found slightly in front of the lost sector chest in a crate if you’re looking from the start of the room. Head to the left side of the arena and you should see a rectangular box with an opening. Enter the crate and you’ll have your second Golden Age Component.
Golden Age Component #3
Our third piece of tech is found over on the right side of the arena right next to the wall. It should be about midway across the wall, right on the other side of a large object. Interact with it and we are more than halfway done finding the components.
Golden Age Component #4
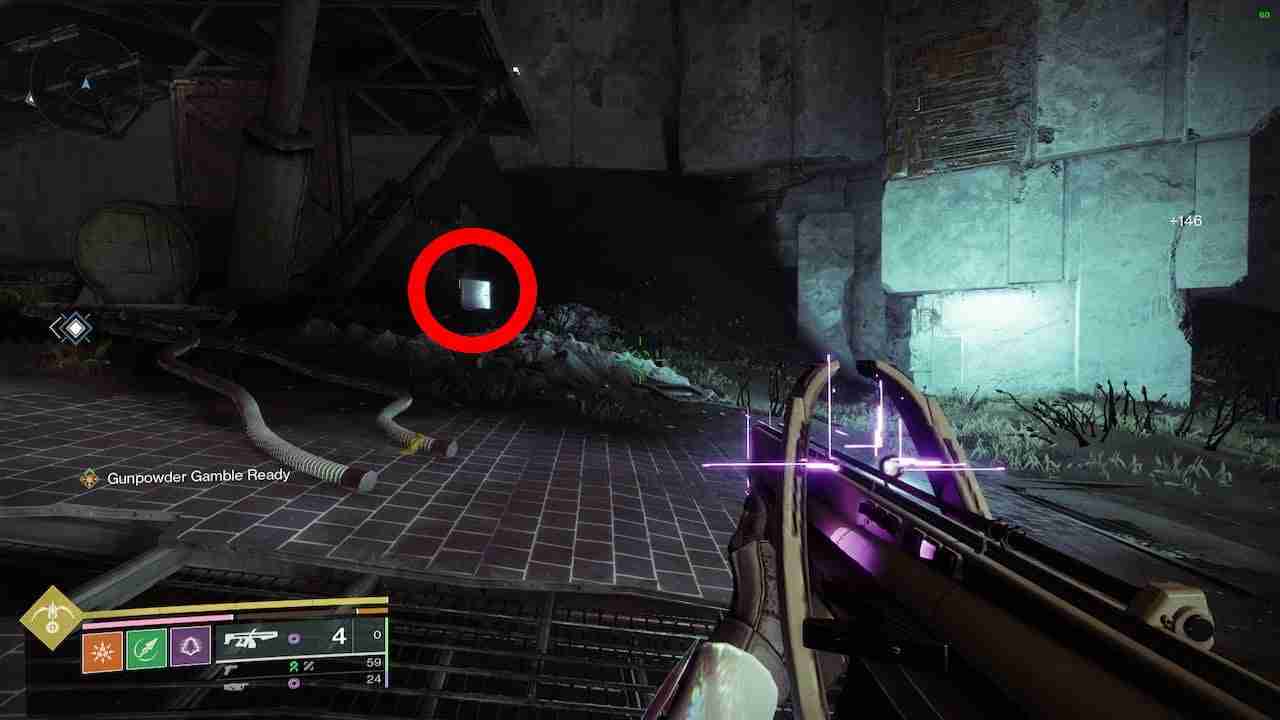
Immediately from where you found the third component, head straight to the back of the wall. You should see the fourth chest on the right back side of the arena.
Golden Age Component #5
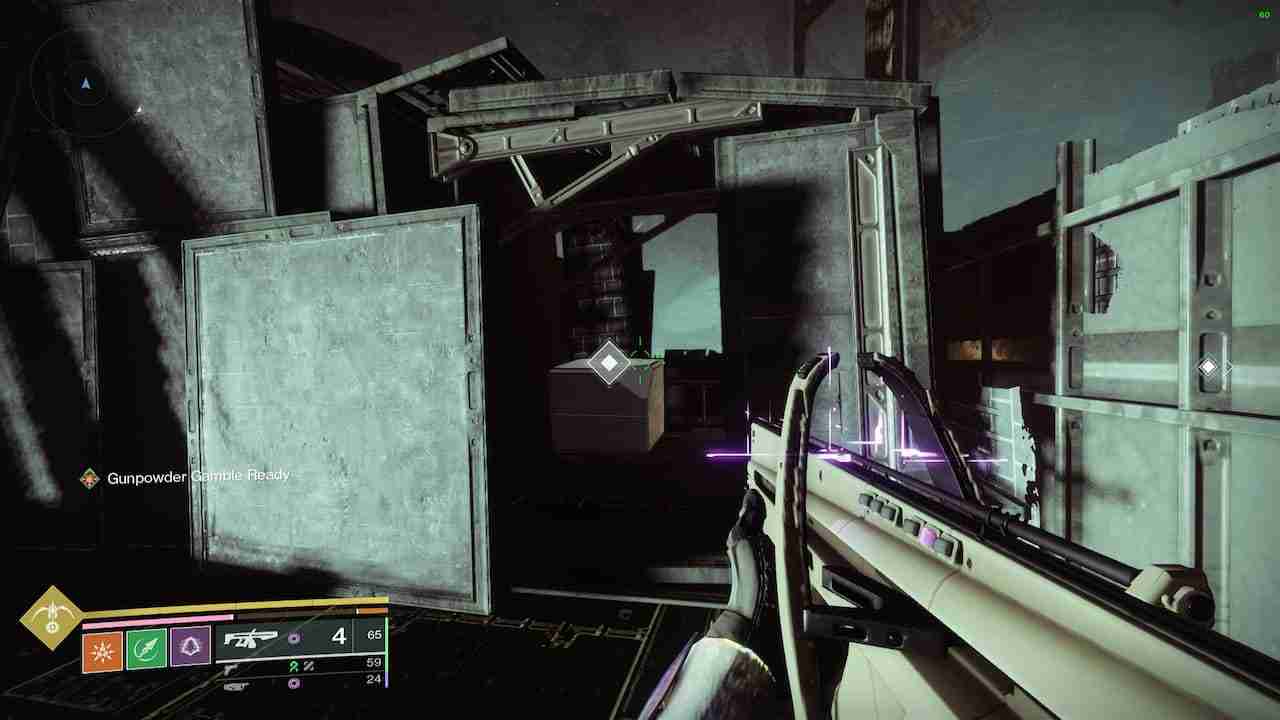
After you snag the fourth piece of tech, turn around looking towards the entrance to the arena, and you should see a raised platform to the right of where you found the third component. Jump up to the second area and inside a room is our final Golden Age Component.
Steps 5 & 6 — Upgrade Failsafe in the H.E.L.M.
Travel back to the H.E.L.M. and interact with Failsafe to upgrade their systems to version 3.0. She gives you a perfected Radiolite Sampler and asks you to complete the latest NES00 quest to progress the story.
Step 7 — Help Failsafe research specimen NES007 and discover its secrets
The next step of A Rising Chorus Act 3 requires you to complete the NES007 side quest, and this might take some time.
NES007: Step 1 — Defeat Vex with Solar damage
Our first stop on the specimen express requires you to defeat 100 Vex with Solar damage. This can be completed anywhere in Destiny 2 but there are a few options that expedite this process.
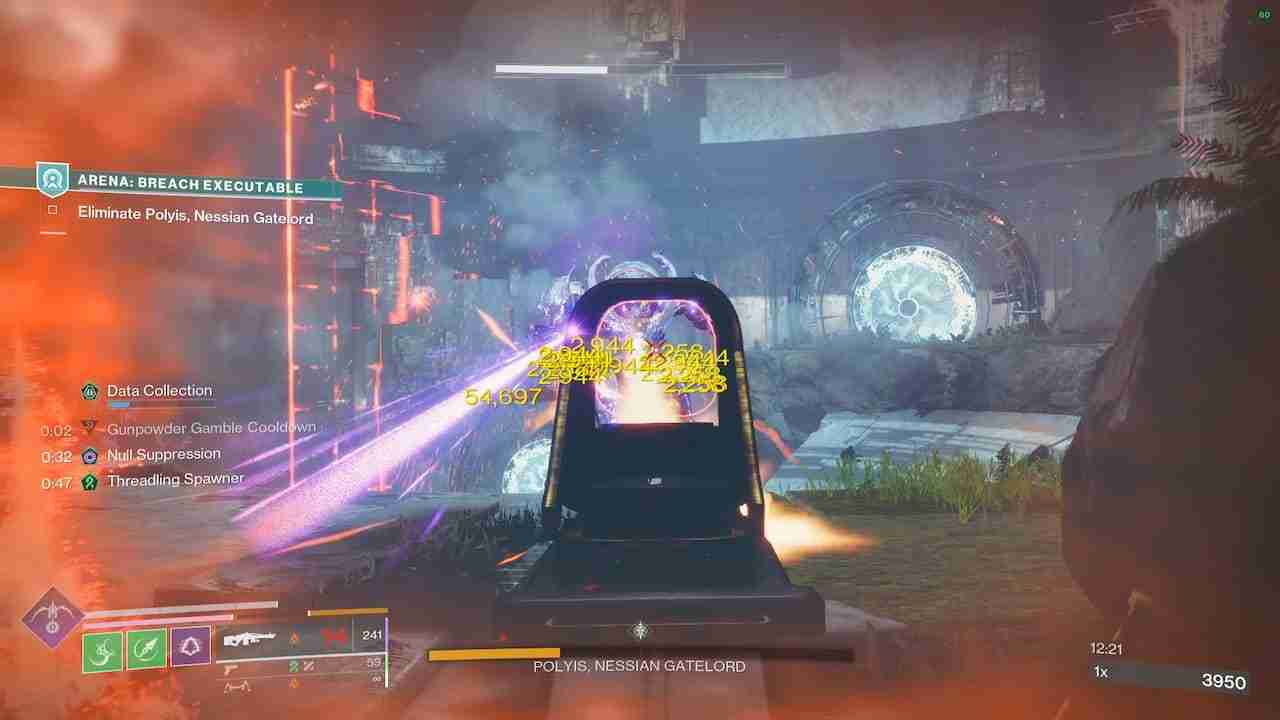
The Arena Breach Executable activity spawns a decent amount of Vex, and you can gather a ton of new Radiolite along the way. However, there are other types of enemies, so you most likely won’t complete this step on your first go around.
Alternatively, if you travel to Artifact’s Edge landing zone on Nessus, you can enter the Orrery Lost Sector which boasts a plethora of Vex to take care of. Take out as many vex as you can without defeating the boss, and then teleport back to the landing zone and head back to the Lost Sector to respawn the Vex. This helped me complete this mission step in no time and is a good place to keep in mind for a later step.
NES007: Step 2 — Secure the data Failsafe needs
Once you’ve melted enough Vex with Solar, our next step asks us to grab Extracted Data and defeat Vex bosses from the Arena Breach Executable activity. While you can complete this by performing other seasonal activities, I chose the Breach Executable activity since you can easily complete this step in one run alone.
NES007: Step 3 — Rapidly defeat Vex to acquire a large sampling of their CPUs
Next up on our fetch quest of the week, we must rapidly defeat Vex in order to progress the quest. Similar to the first step of this sidequest, I chose to head back to the Orrery Lost Sector, slapped on a machine gun and the new Exotic weapon, and went to town. If you optimize these kills, you should get through this step in one or two runs of the lost sector.
NES007: Steps 3 & 4 — Speak with Failsafe in the H.E.L.M. to review her report and display the specimen in your collection
With all those steps complete and out of the way you can return to the H.E.L.M. to speak with Failsafe, who gives you the seventh specimen and asks you to place it in your display behind her.
Step 8 — Visit the holoprojector in the H.E.L.M.

Return once again to Failsafe and interact with her to listen to a message from Saint-14. He goes into detail about how he feels about his whole situation in regard to the Conductor. Furthermore, he tells you that Failsafe is hard at work researching all the readings you provided from the core of Nessus.
Steps 9 & 10 — Visit the holoprojector in the H.E.L.M. and speak to Saint-14
After due time (or a few seconds depending on your date of play), Saint-14 calls you to the H.E.L.M. to speak about the Conductor once again.
Saint explains that he and Osiris are cooking up ways to defeat the corrupted copy of Maya Sundaresh with our brains instead of just brawn. To this note, they require some Exo data from a certain lost sector on Europa.
Step 11 — Recover the Exo data from the Lost Sector on Europa
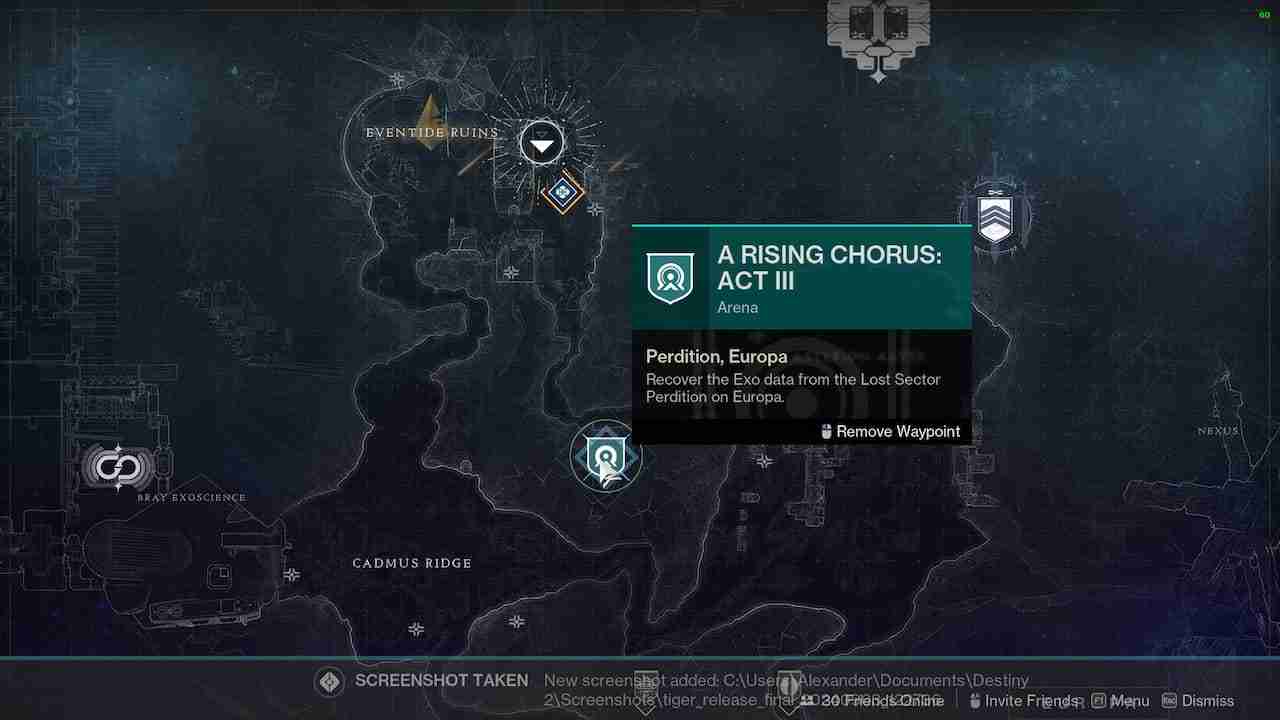
For our first step of week 2, open the Destinations tab, select Europa, and fast travel to the Eventide Ruins landing zone. The lost sector we’re aiming for is Perdition, so when you spawn in head south on your Sparrow. You can get some extra help by tracking the mission and following the objective marker on your screen.
There’s nothing in particular you need to do in the area, simply finish the lost sector by beating the boss at the end and claiming the loot chest.
Step 12 — Locate the consciousness driver on Europa
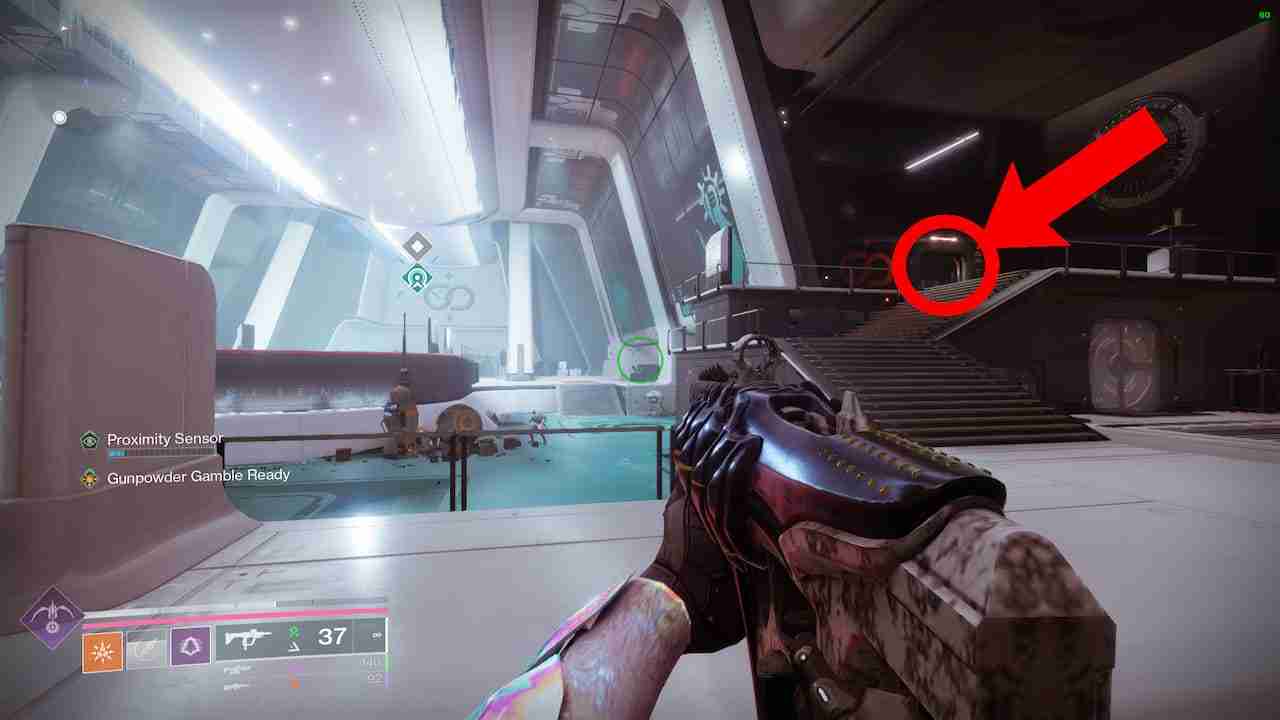
Finishing the lost sector and grabbing the Exo data triggers Failsafe, asking you to grab a consciousness driver from Bray Exoscience on Europa. The easiest and fastest way to get there is by heading back out of the lost sector and taking your sparrow west to the building. This part requires you to use a proximity sensor to find the location of the driver, but we have an easier way.
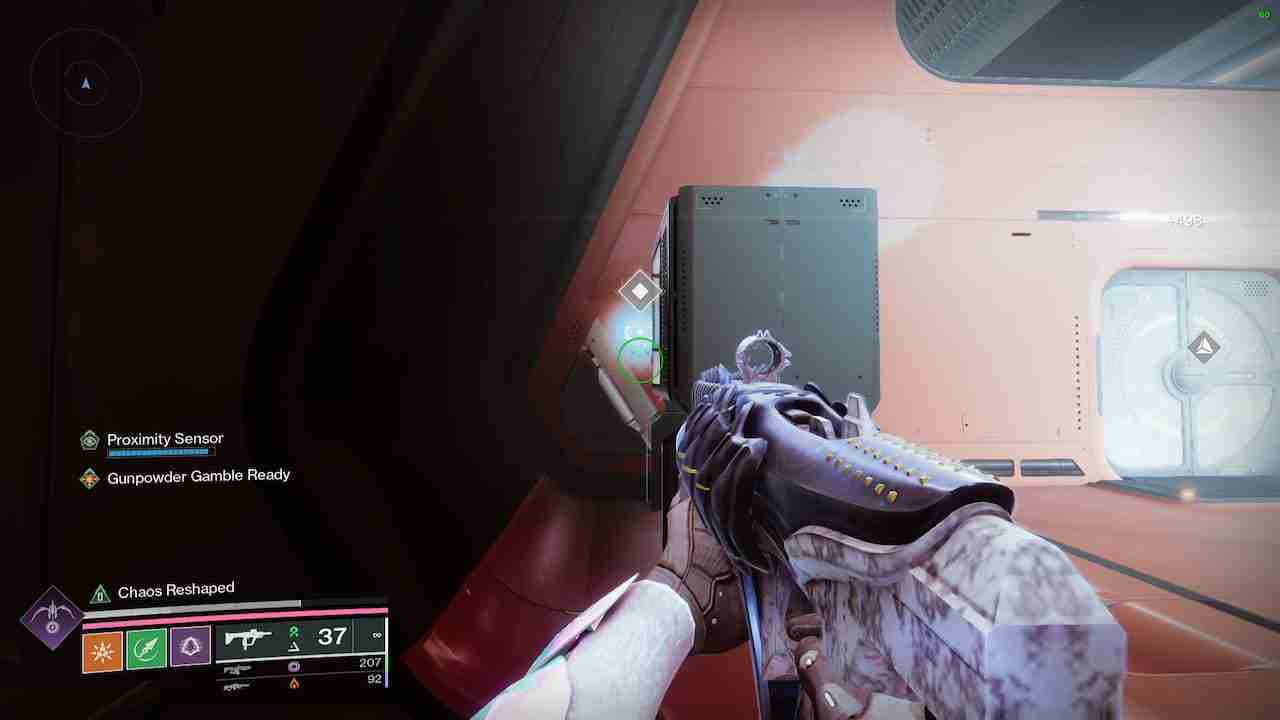
As soon as you enter through the doors, make a right and head up the stairs into the small room on the second floor. Take care of the enemies in here, and behind a vending machine on the right side of the second room, is our driver.
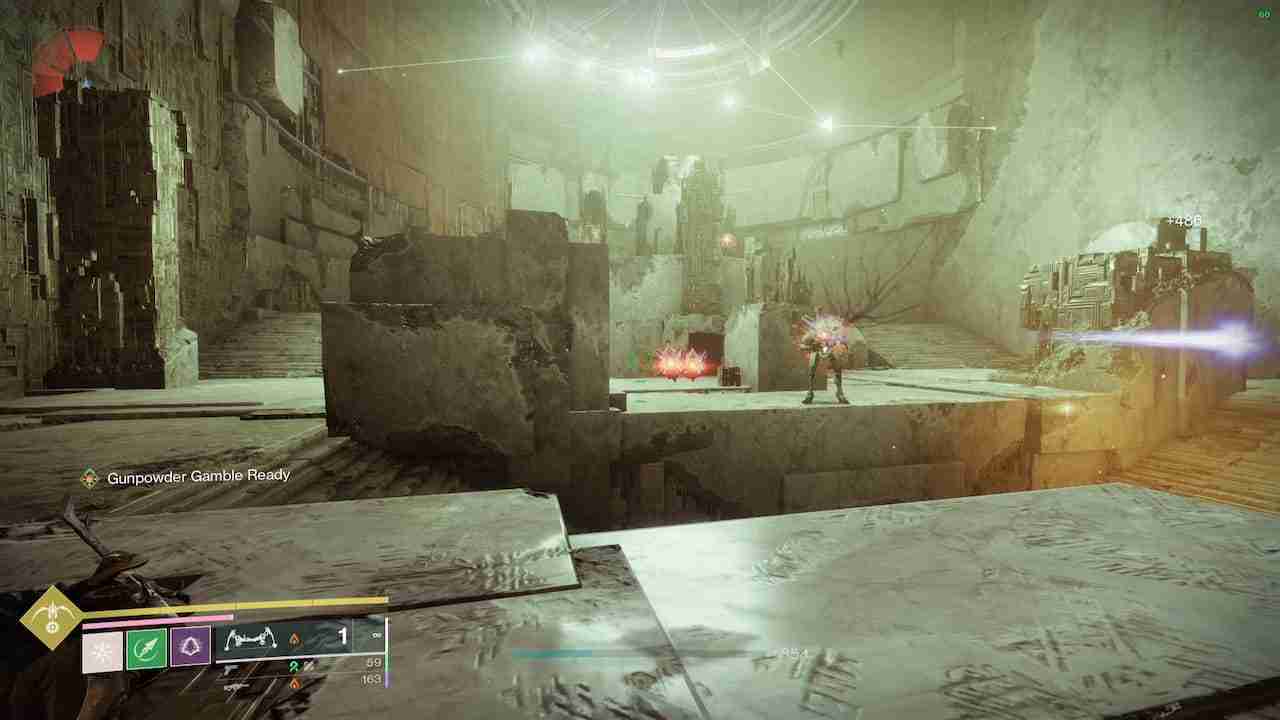
Step 13 — Destroy the Conductor’s Choral Mind in the Exotic Mission Encore
Finally, for the last real step of Destiny 2 A Rising Chorus Act 3 week 2, we must once again complete the new Exotic mission Encore. There’s nothing different about the mission this time, save for a few extra mobs. Your main task is to complete the mission the exact same way you did last week. The only difference is when you reach Maya’s study room before the final boss, we hear another memory of her and a clone of her wife.
Once the final boss of the mission is completed, you’ll get all the great rewards as well as the next step for the story quest.
Step 14 — Visit the holoprojector in the H.E.L.M.
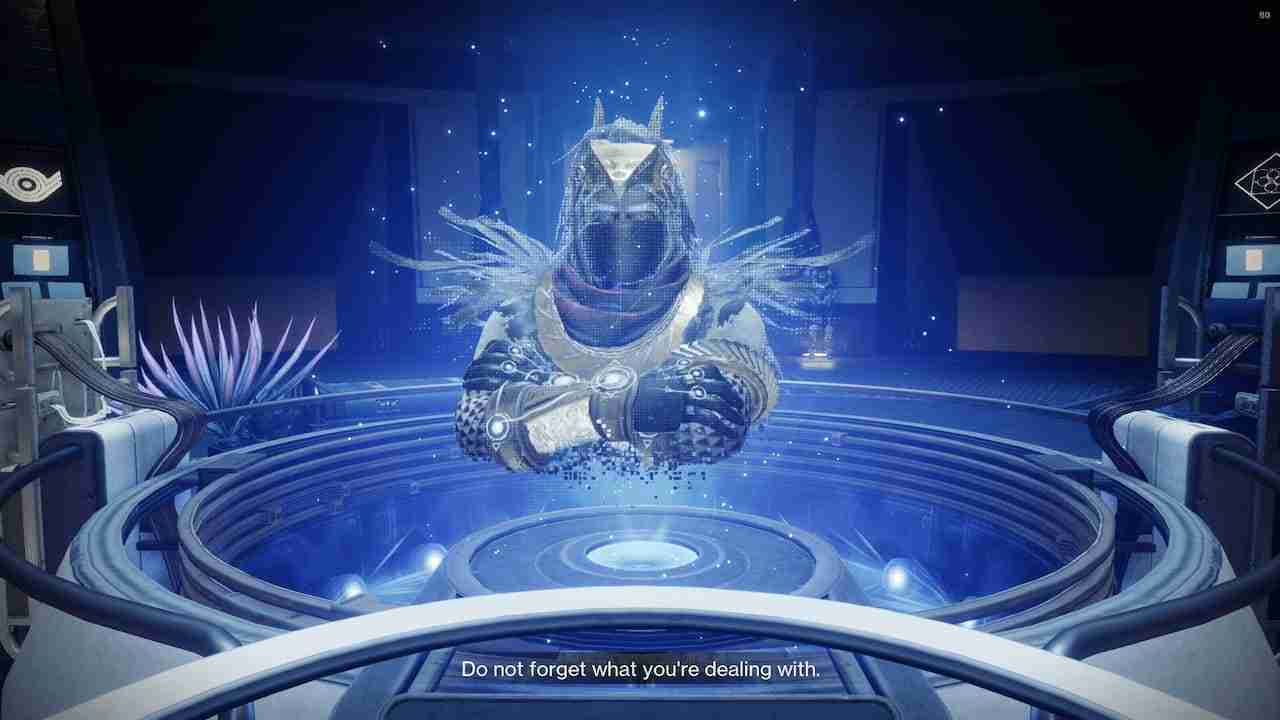
Head back to the H.E.L.M. and you find another caller on the holoprojector, this time it’s Osiris. It’s pretty much more story exposition about him and Saint-14, wishing he didn’t have to know the true horrors of the Conductor because it reminds Osiris of himself. Before he ends the call, he reminds you to remember what kind of monster you’re up against and to be prepared.
Steps 15 & 16 — Visit the holoprojector in the H.E.L.M.
If you happen to have waited until the third week of story content you simply need to interact with the holoprojector yet again and listen to Ikora explain the rundown of the Conductor once again. Except this time, Ikora tells us that it all ends here, as we go to face off against the Conductor (but not really).
Step 17 — Search the Neomuna Veil Containment terminals
Before we get to hop into our favorite Exotic quest for a third week in a row, we need to find the “true” Chioma by interacting with one of the terminals on Neomuna in the room above where we fought Calus for the last time.

Head to Destinations, select Neomuna and travel to the Veil Containment quest all the way on the left side of the map. While you do have a radar, when you spawn the terminal in question should be located a few feet in front of you to the left.
Step 18 — Install a network relay for Failsafe to boost her connection
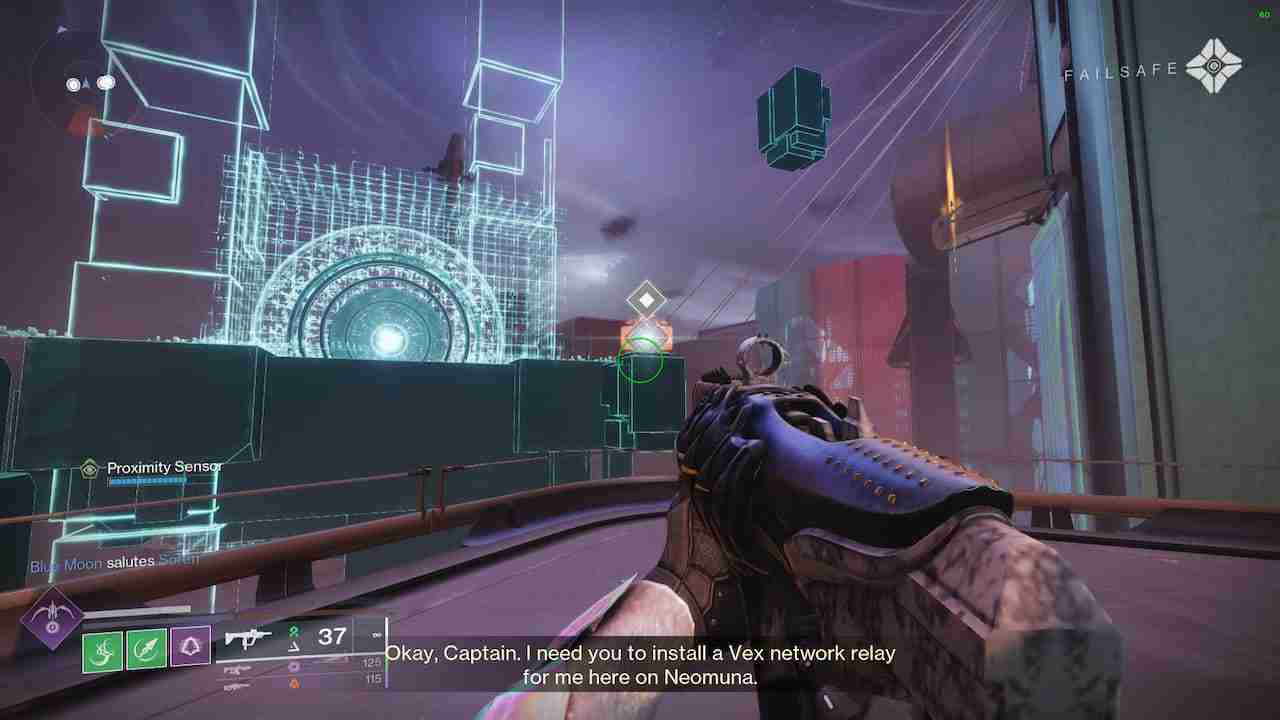
Listen to Failsafe’s dialogue after you scan the terminal, then teleport over to the Liming Harbor landing zone and make your way to Ahimsa Park. Upon arriving in the area, keep towards the left wall until you reach an entry to the vex network.
In front of the teleporter, you should see the same icon that was above the terminal you previously scanned. Interact with it to place the network relay, and Failsafe now has a backdoor into the Vex network, in case anything goes awry this time around.
Step 19 — Stop the Conductors plans by destroying the Choral Mind in Exotic mission Encore
Next, we must once again head back into the exotic mission Encore for the third week in a row and complete it in the exact same way. There are a few new enemies, such as Cabal champions influenced by the Conductor, but short of that and some extra heavy ammo in the final boss, you should be fairly familiar with this quest by this point.
Step 20 — Confront the Conductor
Finally, after weeks and months of waiting for the final showdown with the first big villain since The Witness. And sadly, all we get is a cutscene that plays after you complete the exotic mission. The Conductor goes down and gets swallowed into the Vex network, lurking for its next opportunity.
Steps 21 & 22 — Speak with Failsafe and Saint-14 in the H.E.L.M.
Head back to the H.E.L.M. and you can recap the last few months with Failsafe, as she celebrates the bittersweet end of your partnership. After discussing it with her, head behind her where Saint-14 gives his own spiel about what it means to “be” and how he is happy with who he is now.
The end of the first Episode in Destiny history was a bit of a fizzle, but overall it looks as if Bungie has an idea for the direction they want to take Destiny 2 in the coming years. We must now wait until October 2024 to get the next fix of story content. In the meantime, if playing with Solar weapons for the week 1 quest was enticing, then our Solar Warlock builds might be right up your alley.
-
 シーズン2の最後は、アビーの俳優を保護するために変化しますHBOの最後のの背後にあるクリエイティブチームが、シリーズの基礎となるゲームであるののの非線形イベントをどのように適応させるかを見るために何年も待っていました。シーズンがゲームにないシーンから始まるので、ジャンプから大きな変化がありました。 最初のシーズンの極めて極端な会話に短い戻ってきた後、私た...ゲーム 2025-05-03に投稿されました
 -
デルタフォース弾薬と鎧システムの詳細な説明従来のFPSゲームとは異なり、抽出シューターにはより高度な鎧と弾薬の損傷システムがあります。 delta force の操作モードも違いはありませんが、そのバージョンは、Escapt from Tarkovのようなゲームと比較して、ある程度単純化されています。どんな鎧を着るか、どの弾薬を使用するか...ゲーム 2025-05-03に投稿されました
-
神秘的なルーレットの奇妙な冒険:分割フィクション猿の王の領域を離れた後、あなたは奇妙な小さな角につまずくでしょう。バナナを吐き出すスロットマシン(なぜですか?)と、非常に重要に見えるルーレットがありますが、実際には何もありません。 このルーレットには隠された秘密のパズルやゲームの仕組みがあると思うかもしれません。たぶんそれを正しく回転させ...ゲーム 2025-05-03に投稿されました
-
PETシミュレーター99 VIPのメリット詳細な説明Pet Simulator 99のVIPゲームパス:Robuxの価値はありますか? 多くのRobloxゲームは購入のためのゲームパスを提供しており、Pet Simulator 99も例外ではありません。 400 Robuxの価格であるVIPゲームパスは、多くの利点と報酬を約束しています。しかし、...ゲーム 2025-05-03に投稿されました
-
神々のロックを解除するためのSmite2ガイドSmite 2の神々はあなたの指先ではありません。神のラインナップを拡大するには、努力する必要があります。神々のロックを解除し、夢のラインナップを構築する方法は次のとおりです。 Smite 2で神々のロックを解除する方法 ファウンダーパック:既存と未来の両方ですべての神々のロックを解除...ゲーム 2025-05-02に投稿
-
アニメの最後のスタンドでポータルを取得する方法アニメラストスタンドアップデート2は、ゲームをマスターするために重要な特別なユニットを取得するための新しい方法であるポータルを紹介します。このガイドでは、これらのポータルを取得して利用する方法について説明します。 アニメのロック解除最後のスタンド: ポータルを取得するための最も効果的な...ゲーム 2025-05-02に投稿
-
任天堂はスイッチ2でブレスオブザワイルドの良いニュースを発表しますdisaping News:Nintendo Switchの2番目のバージョン「The Legend of Zelda:Breath of the Wild」にはDLCコンテンツが欠落している可能性があります 任天堂は、ゼルダの伝説の完全な体験を楽しみにしているプレイヤーにいくつかの悪いニュースを...ゲーム 2025-05-02に投稿
-
「亡命する道」戦士の職業戦略Path of Exile 2中的战士:近战格斗大师 战士是《流放之路2》中典型的近战格斗职业。一手持战锤,一手持大盾,战士化身为战场上的坦克,吸收伤害的同时,用强大的打击击溃敌人。 战士在攻防两方面都能专精,使其成为一个优秀的全能型职业。如果您想在《流放之路2》中扮演战士,以下内容将向您介绍该职业...ゲーム 2025-05-02に投稿
-
Haolong:ハワイの海賊とギャングの富の神の神社redい戦略「Dragon:Infinite Wealth」のように、おなじみのKamurochoのマスコットであるKamulopは、彼のフォーチュン交換ショップで戻ってきます! このガイドでは、ショップのロックを解除し、紙の運命を見つけ、店のユニークな報酬を利用する方法を詳しく説明しています。 ホノル...ゲーム 2025-05-01に投稿
-
Mudborne:ストレージスペースを追加する方法Mudborneの最初の在庫は広々としていると感じていますが、カエルを探索し、繁殖し、リソースの収集はすぐにより多くのストレージを必要とします。 幸いなことに、収容能力を拡大するためにいくつかのオプションが存在します。一部の家具は特定の生き物に対応していますが、進行するにつれて多数のストレージソ...ゲーム 2025-05-01に投稿
-
-
Sims 4 Werewolf ModeチートコードコレクションThe Sims 4 Werewolves rounds out the trilogy of occult-themed game packs, giving your Sims the ability to transform into a beastly, barely-humanoid ba...ゲーム 2025-05-01に投稿
-
モンスターハンターワイルドファイアストーンは、場所とガイドを取得しますMonster Hunter Wilds Craftingにはさまざまな特別な素材が必要であり、火災が最初に必要なのは武器と鎧に必要です。 ただし、その場所は明示的にマークされていません。このガイドでは、どこを見つけて効率的にファームストーンを農場に説明しています。 モンスターハンターワイルドで...ゲーム 2025-05-01に投稿
-
王朝の覇権の起源の究極のロック解除戦略と隠された要素「Dynasty Wushuang:Origin」の後の挑戦:Lu Bu、Red Rabbit Horse、およびよりエキサイティングなコンテンツのロックを解除してください! 「王朝の無敵:起源」の主な陰謀を破ったことをお祝いします!本当の楽しみが始まったばかりで、ゲームの豊かな遅いコンテン...ゲーム 2025-04-30に投稿されました
-
苏丹游戏:13个新手必备攻略スルタンのゲームをマスター:1001アラビアの夜を生き残るためのガイド in sultan's game で、あなたは狂った君主の危険な世界をナビゲートし、毎日の課題を通して生存を努めています。 このガイドは、スルタンを追い越し、迅速で不快な終わりを避けるための重要なヒントを提供します...ゲーム 2025-04-30に投稿されました


中国語を勉強する
- 1 「歩く」は中国語で何と言いますか? 走路 中国語の発音、走路 中国語学習
- 2 「飛行機に乗る」は中国語で何と言いますか? 坐飞机 中国語の発音、坐飞机 中国語学習
- 3 「電車に乗る」は中国語で何と言いますか? 坐火车 中国語の発音、坐火车 中国語学習
- 4 「バスに乗る」は中国語で何と言いますか? 坐车 中国語の発音、坐车 中国語学習
- 5 中国語でドライブは何と言うでしょう? 开车 中国語の発音、开车 中国語学習
- 6 水泳は中国語で何と言うでしょう? 游泳 中国語の発音、游泳 中国語学習
- 7 中国語で自転車に乗るってなんて言うの? 骑自行车 中国語の発音、骑自行车 中国語学習
- 8 中国語で挨拶はなんて言うの? 你好中国語の発音、你好中国語学習
- 9 中国語でありがとうってなんて言うの? 谢谢中国語の発音、谢谢中国語学習
- 10 How to say goodbye in Chinese? 再见Chinese pronunciation, 再见Chinese learning


